Content Marketing Writing: A Practical Guide That Converts

Most businesses treat writing blog posts and writing marketing content as the same thing. They're not. A blog post can exist purely to inform. Content marketing writing is built to do something specific: attract the right audience, earn their trust, and move them toward a decision. That distinction matters more than most marketers realize.
Here's the problem: knowing that difference doesn't automatically make execution easier. You still have to research keywords, understand what your audience actually wants, structure content for both readers and search engines, and publish consistently enough to build momentum. Most teams either burn out or cut corners, and both paths lead to content that sits on page four of Google, collecting dust instead of traffic.
That's exactly the kind of problem we built RankYak to solve. Our platform automates the heavy lifting of SEO content, from keyword discovery to publishing, so businesses can maintain a steady output of optimized, high-quality articles without draining their team's time. But automation works best when you understand the fundamentals behind it. Knowing what makes content marketing writing effective gives you the ability to evaluate output, refine your strategy, and get better results whether you write every word yourself or let a tool handle it.
This guide breaks down what content marketing writing actually involves, how it differs from general content writing, and the practical steps you can take to create content that ranks and converts.
What content marketing writing is
Content marketing writing is the practice of creating written content that serves a strategic business purpose while genuinely helping the reader. It is not simply producing words for a website. Every article, guide, or landing page that falls under content marketing writing is designed with a specific outcome in mind: building brand authority, generating leads, or nudging a potential customer closer to a purchase. The writing has to earn the reader's attention first, and then do work for your business second. That dual obligation is what makes it different from any other form of writing.

The core purpose behind every piece
At its foundation, content marketing writing treats every piece of content as a business asset, not a throwaway task. A single well-researched article can drive qualified traffic for months or even years if it ranks well and genuinely answers what your audience is searching for. That means the writing process starts long before you open a blank document. You need to understand who you're writing for and what problem they're trying to solve, along with where they are in their journey from first learning about a topic to eventually making a buying decision.
The best content marketing writing is useful enough that readers would share it, and specific enough that it consistently reaches the exact people your business needs to reach.
This goal-driven approach is what separates content marketing writing from blogging without a plan. When you write with purpose, every paragraph earns its place. You cut the fluff, sharpen the structure, and lead the reader toward something meaningful, whether that is signing up for a newsletter, requesting a demo, or simply trusting your brand more than they did before they clicked.
What effective content marketing writing looks like
Strong content marketing writing is reader-focused at the surface and business-focused underneath. On the surface, it answers real questions, explains complex ideas clearly, and gives the reader something actionable they can apply. Underneath, it reinforces your brand's credibility, targets keywords your potential customers are already searching, and moves traffic toward pages or offers that matter to your business goals.
You will notice a few consistent traits across content that performs well. It tends to use plain language over jargon, stay tightly focused on one topic per piece, and include a clear next step for the reader. The structure is intentional: a strong opening that confirms the reader is in the right place, a body that delivers on the promise of the headline, and a close that tells the reader what to do next. None of those elements happen by accident. They all come from a clear understanding of what you want the content to accomplish.
Here are the core traits that define effective content marketing writing:
- Audience clarity: You know exactly who you are writing for before you write a single sentence
- Search intent alignment: The content matches what the target reader is actually looking for, not just what you want to say
- Structured delivery: Headers, short paragraphs, and a logical flow make the content easy to scan and act on
- A clear call to action: Every piece points the reader toward a specific next step, even if that step is subtle
- Credibility signals: Facts, examples, and a confident tone build trust with readers who are new to your brand
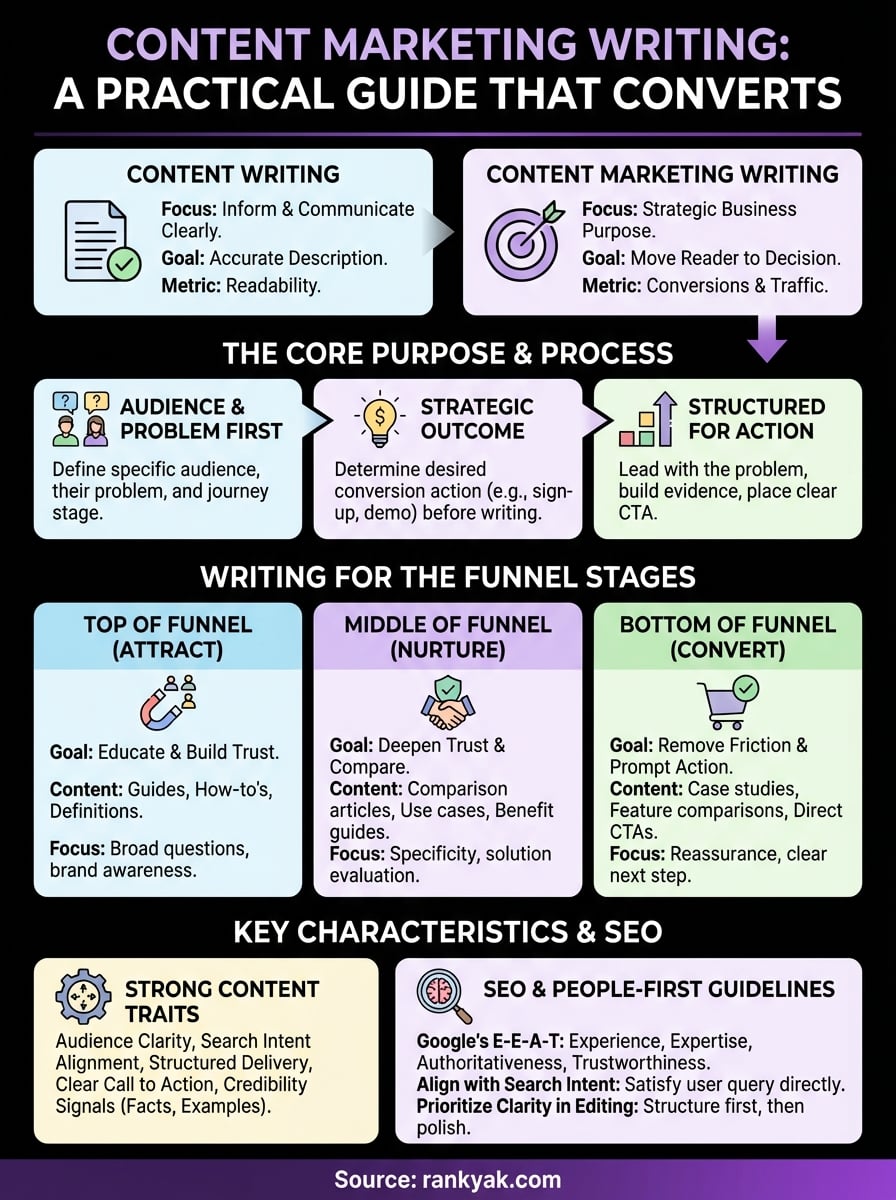
Content marketing writing vs content writing
Both terms sound like they describe the same work, and that confusion causes real strategic problems. Content writing refers to producing written material for a website, whether that is a product description, a FAQ page, or a technical explainer. Its primary job is to communicate information accurately and clearly. Content marketing writing carries an additional layer of intent. Every piece is part of a larger strategy designed to attract a specific audience, build trust over time, and move readers toward a defined business outcome.

Where the goals diverge
The clearest way to see the difference is to look at what success means for each type. A content writer producing a product description succeeds when the copy reads well and describes the product accurately. A content marketing writer working on a comparison guide succeeds when that guide ranks for the right search terms, earns the reader's trust, and nudges them toward a purchase decision. The outcome standard is fundamentally different from the start.
Content writing asks "Does this communicate well?" Content marketing writing asks "Does this move someone toward a decision?"
That distinction shapes every choice you make during the writing process: the topic you pick, the angle you take, the keywords you target, the call to action you include, and how you measure results. Content writing is often considered finished when the page goes live. Content marketing writing gets measured weeks or months later by the traffic it generates and the conversions it produces.
How they work together in practice
You do not have to choose one over the other. Most websites need both, and the strongest content strategies blend them deliberately. Your product pages need clean, accurate content writing. Your blog, resource library, and pillar guides need content marketing writing that pulls in organic traffic and guides visitors further into your site.
The real problem comes when teams treat every page the same way. Writing a strategic long-form guide the same way you write a product description produces content that neither ranks well nor converts reliably. Knowing which mode you are in before you start writing keeps you from that mistake and ensures that every piece in your library has a clear job to do for your business.
Why content marketing writing matters for growth
Content marketing writing builds compounding value in a way that paid advertising cannot replicate. When you publish a well-optimized article that answers a question your audience is actively searching for, that piece keeps working long after you hit publish. Paid ads stop delivering the moment your budget runs out, but organic content keeps generating traffic, building trust, and bringing in leads without additional spend. That asymmetry is why businesses that invest consistently in content tend to outgrow those that rely solely on paid channels.
It builds audience trust before they buy
Most buyers do not purchase the first time they encounter your brand. They research, compare, and return when they feel confident. Content marketing writing gives you a way to show up during that research phase and establish credibility before a reader ever reaches your product page. A detailed guide, a comparison article, or a well-structured how-to post all demonstrate that your brand genuinely understands the problem the buyer is trying to solve.
The brands that show up consistently with useful, specific content are the ones readers remember when they are ready to buy.
When your content answers real questions accurately and with depth, readers begin to associate your brand with expertise in your space. That association does not come from a single piece. It builds across multiple touchpoints, and each quality article you publish adds another layer to the trust your audience extends to you over time.
It drives sustainable organic traffic
Search traffic is not guaranteed, but content marketing writing gives you a repeatable path toward earning it. Each article you publish targeting a specific keyword creates another opportunity to appear in front of someone who is actively looking for what you offer. Unlike social posts that disappear within hours, a well-ranked article can deliver consistent clicks for months or years without any additional cost.
The compounding nature of organic search is what makes content one of the highest-return growth channels available to your business. As your library grows and internal links connect related topics, search engines accumulate more evidence of your site's authority in your niche. You start ranking for more terms, pulling in more traffic, and building a foundation that becomes increasingly difficult for competitors to displace.
What strong content marketing writing includes
Strong content marketing writing doesn't happen by accident. Every high-performing piece shares a set of identifiable characteristics that you can learn, apply, and check against before you publish. Understanding those characteristics gives you a concrete standard to measure your work against, rather than relying on a gut feeling that something reads "well enough."
A clear understanding of your audience
Before a single word goes on the page, you need a precise picture of who you're writing for and what they need. That means knowing their specific problem, the language they use when they search for answers, and the level of familiarity they bring to the topic. Content marketing writing that performs well never assumes a generic reader. It speaks directly to a person in a particular situation, which is why readers feel like a piece was written specifically for them rather than for everyone at once.
The more clearly you define your audience before writing, the less work each sentence has to do to earn their attention.
Evidence and specificity
Vague content loses readers fast. Strong content marketing writing backs up every claim with a specific example, a data point, or a concrete illustration that proves the point. When you make an assertion, your reader is silently asking "how do I know that's true?" Using precise numbers, named examples, and real scenarios builds credibility in a way that broad generalizations never can.
Readers also respond to evidence because it signals that you've done the work. A piece that references a specific study, walks through a real use case, or demonstrates a concrete process tells your audience that the author genuinely understands the topic. That trust is exactly what content marketing writing is designed to build across multiple touchpoints over time.
A defined structure from start to finish
Your content needs a clear skeleton that guides the reader from the opening through to the next step you want them to take. A strong structure means your headline sets an accurate expectation, your introduction confirms the reader is in the right place, and each section builds logically on the last. Without that framework, even well-written content loses readers partway through.
Every section should earn its place by advancing the reader's understanding or moving them closer to action. If a paragraph doesn't do one of those two things, cut it before it costs you the reader's attention.
How to write content marketing that converts
Writing content that converts starts with one shift: you write for a specific person with a specific problem, not for a general audience browsing the web. Most content fails to convert not because of poor mechanics, but because the writer never committed to a clear outcome before starting. Once you define what you want a reader to do after finishing the piece, every structural and stylistic decision becomes easier to make.
Start with a specific outcome in mind
Before you write your first sentence, decide what conversion looks like for this particular piece. It might be a newsletter sign-up, a demo request, or simply a click to a deeper resource on your site. Knowing the endpoint shapes everything from your introduction to your close. Content marketing writing that converts is built backward from the action you want the reader to take, with every section building the case for why that next step makes sense for them.
The clearest sign of purposeful writing is that the reader can tell exactly what to do next and why it is worth doing.
Common conversion goals worth defining upfront include:
- Clicking through to a product or service page
- Subscribing to a newsletter or email sequence
- Downloading a resource or starting a free trial
- Contacting your team or requesting a demo
Lead with the reader's problem
Your opening has one job: confirm to the reader that they are in the right place. Readers scan the first few sentences and decide within seconds whether to keep reading or leave. If you bury their problem under background context or brand history, you lose them before you build any trust. Open by naming the specific situation your reader is in, and immediately signal that the content will help them move through it.
Strong openings tend to mirror the exact language a reader would use to describe their situation. Using your audience's vocabulary instead of internal company language makes your writing feel tailored to them, which increases both engagement and the likelihood they act on what you share.
Build toward action throughout the piece
Conversion does not happen at the end of an article. It builds across every section through small moments of alignment where the reader thinks "this applies to me." Use concrete examples that reflect your reader's real situation and place your call to action at the natural moment when a reader has enough context to say yes.
Waiting until the last sentence to introduce a call to action is one of the most common reasons content fails to produce measurable results after it publishes.
How to write for each stage of the funnel
Not every reader arrives at your content ready to buy. Where someone sits in their buying journey determines what they need from your writing, and content marketing writing that ignores this distinction tends to frustrate readers at every stage. A person discovering your brand for the first time needs something entirely different from someone actively comparing solutions. Matching your content's purpose to the reader's stage is one of the most direct ways to improve both engagement and conversion rates across your content library.
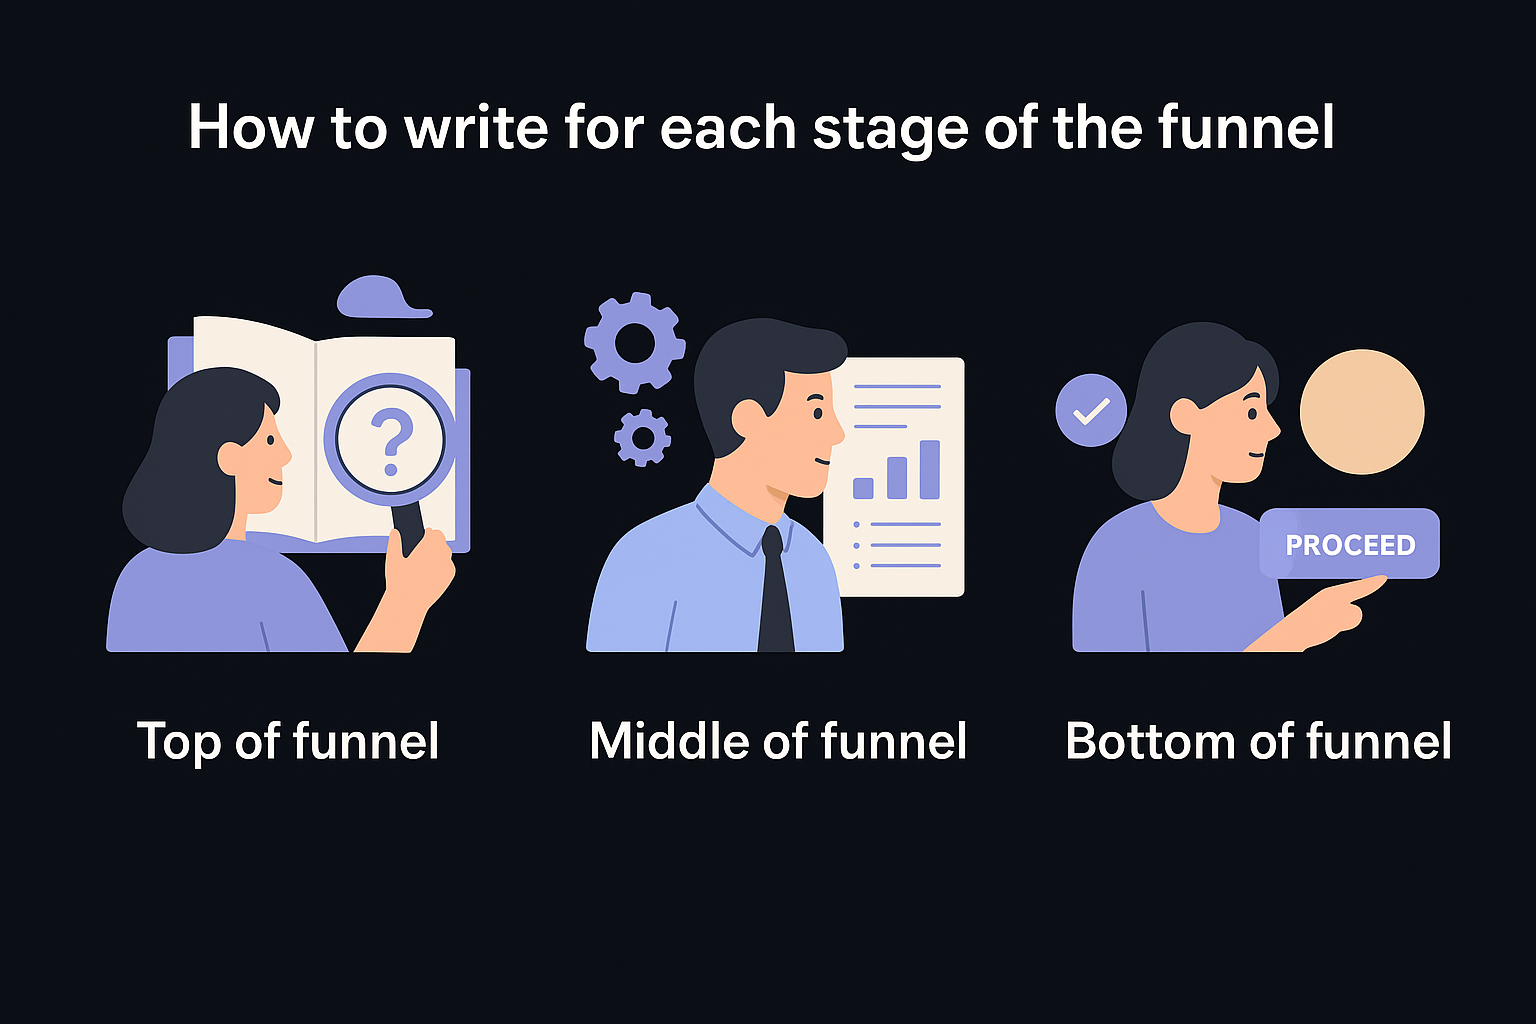
Top of funnel: attract and educate
At the top of the funnel, your reader has a problem but may not yet know exactly what solution they need. Your writing job here is to help them understand their situation more clearly, not to sell. Use broad, high-traffic keywords and structure your content around the questions your audience types into search when they first encounter the issue. Educational guides, how-to articles, and definition posts work well at this stage because they meet readers at the beginning of their research and start building trust with your brand before any purchase decision is on the table.
The goal at the top of the funnel is not conversion. It is recognition that your brand understands the problem.
Middle of funnel: build trust and narrow options
Readers in the middle of the funnel know what type of solution they want and are now evaluating their options. Your writing needs to demonstrate depth and credibility at this stage. Comparison articles, detailed use-case breakdowns, and specific benefit-focused guides all perform well here because they show how your solution addresses the reader's exact situation. You want the reader to feel informed and confident after finishing the piece, not sold to.
At this stage, specificity matters more than breadth. A guide that walks through a single scenario in detail will outperform a surface-level overview every time, because middle-funnel readers are actively filtering out anything that feels generic.
Bottom of funnel: remove friction and prompt action
At the bottom of the funnel, your reader is close to a decision. They need reassurance, not more education. Your writing should address the specific hesitations that stop a ready buyer from converting and make the next step obvious. Case studies, direct feature comparisons, and tight calls to action belong at this stage. Keep the copy focused, lead with the outcome the reader wants, and cut anything that adds length without adding confidence.
SEO and people-first guidelines that influence writing
SEO and writing quality are not competing priorities in content marketing writing. Google's ranking systems are built to surface content that genuinely helps readers, which means writing well for people and writing well for search are effectively the same goal. If you treat SEO as a checklist you apply after writing, you miss the bigger picture. The guidelines that shape how your content ranks are, at their core, guidelines about producing content that earns trust from real people.

Google's E-E-A-T framework shapes your credibility
Google's helpful content guidelines center on four qualities: experience, expertise, authoritativeness, and trustworthiness. Of the four, trust carries the most weight. Your writing demonstrates trust when it cites accurate information, shows that the author genuinely understands the topic, and avoids making claims that fall apart under basic scrutiny. Adding a byline, linking to credible sources, and including specific examples all signal to both readers and search engines that your content was produced with care and intention.
The strongest signal you can send with your writing is that you created it primarily to help a real person, not to rank for a keyword.
For topics that affect someone's health, finances, or safety, Google applies stricter standards. Your writing needs to reflect genuine knowledge, not surface-level summaries of what other sources already say. If you cover these areas without demonstrated depth, your content will struggle to rank regardless of how well you handle the technical side of optimization.
Align your writing with search intent before anything else
Search intent is the most important SEO factor you control through your writing decisions. Before you finalize a topic, confirm what a reader actually expects to find when they search that phrase. If someone types a question into Google, they want a direct answer, not a product pitch. Writing that mismatches intent gets abandoned quickly, which sends negative signals to search engines that your content didn't satisfy the query.
Check the current top results for your target keyword before you write. Notice the format, depth, and angle those pages use, then decide how your piece can serve the reader more effectively rather than simply replicating what already exists. Matching intent means understanding why someone searched, not just what words they typed. That distinction consistently separates content that ranks from content that sits on page three with nothing to show for the effort behind it.
Editing, QA, and a repeatable workflow
Publishing without editing is one of the fastest ways to undermine the trust your content marketing writing is designed to build. Even strong first drafts carry sentences that run too long, claims that need sharper evidence, and sections that drift from the stated purpose. A consistent editing and QA process is what separates content that looks polished from content that actually performs.
Edit for clarity before you edit for polish
Most writers jump straight into fixing grammar and word choice, but structural clarity matters more than surface-level polish. Read your draft once before touching individual sentences. Ask whether each section delivers on the promise your headline made, whether the opening hooks the right reader, and whether the call to action follows logically from what came before. Fix the big problems first, then work down to sentence-level corrections.
Readers forgive imperfect sentences far more readily than they forgive unclear structure or a point that never lands.
Once the structure holds, tighten your writing by cutting sentences that repeat what a previous paragraph already said. Redundancy is the most common reason strong drafts run too long, and removing it typically improves both clarity and reader retention without changing your core argument.
Build a QA checklist you actually use
A QA checklist removes the guesswork from your review process and makes quality consistent across every piece you publish, regardless of who writes it. Build yours around the elements that have the highest impact on both reader experience and search performance:
- Search intent match: Does the piece answer what the reader actually searched for?
- Headline accuracy: Does the title reflect what the content delivers?
- Factual accuracy: Are all claims supported by accurate, verifiable information?
- Call to action clarity: Is the next step obvious and placed at the right moment?
- Internal links: Does the piece connect to related content on your site?
- Readability: Are paragraphs short enough to scan and headings descriptive enough to navigate?
Make the workflow repeatable
A repeatable workflow means you document every step from draft to publish so the process does not depend on any single person remembering what needs to happen. Assign clear ownership for each stage: who writes, who edits, who runs QA, and who publishes. Consistent execution across every article is what turns individual pieces into a content library that compounds in authority and reach over time.
Next steps
Content marketing writing works when every piece has a clear purpose, targets the right reader at the right stage, and earns trust through specificity and accuracy. The principles in this guide give you a solid framework to evaluate your current content and identify exactly where your writing process needs tightening, whether that is audience definition, funnel alignment, or your editing workflow.
Putting these principles into practice takes time, and consistent daily publishing is where most teams run into real friction. Keyword research piles up, drafts take longer than planned, and the gap between strategy and execution widens. That is the gap RankYak closes. The platform handles keyword discovery, article creation, and publishing automatically, so your content library grows every day without draining your team. Start your three-day free trial and see how much ground you can cover when the process runs on autopilot.

Get Google and ChatGPT traffic on autopilot.
Start today and generate your first article within 15 minutes.

SEO revenue calculator
How much revenue is your website leaving on the table?
Take a quick quiz and see exactly how much organic revenue you're missing out on, along with personalized tips to fix it.
-
4 questions, under 1 minute
-
See traffic and revenue potential
-
No email required
Free · takes 1 minute · no signup needed
Question 1 of 4
Question 2 of 4
Question 3 of 4
Question 4 of 4
Your SEO growth potential
Extra visitors / month
after 6-12 months of consistent publishing
Revenue potential / year
at your niche's avg. conversion rate
Articles needed (12 mo)
to reach this traffic level
ROI with RankYak
at $99/mo ($1,188/year)
To hit that number, you'd need to:
- Build a topical authority strategy for your niche
- Research keywords & map out a full topical cluster
- Write, edit & publish an article every single day
- Build backlinks to the articles you publish
RankYak handles all of this automatically, every day.
* Estimates based on industry averages. Results vary by niche, competition, and domain authority. Most SEO results become visible after 3-6 months of consistent publishing.