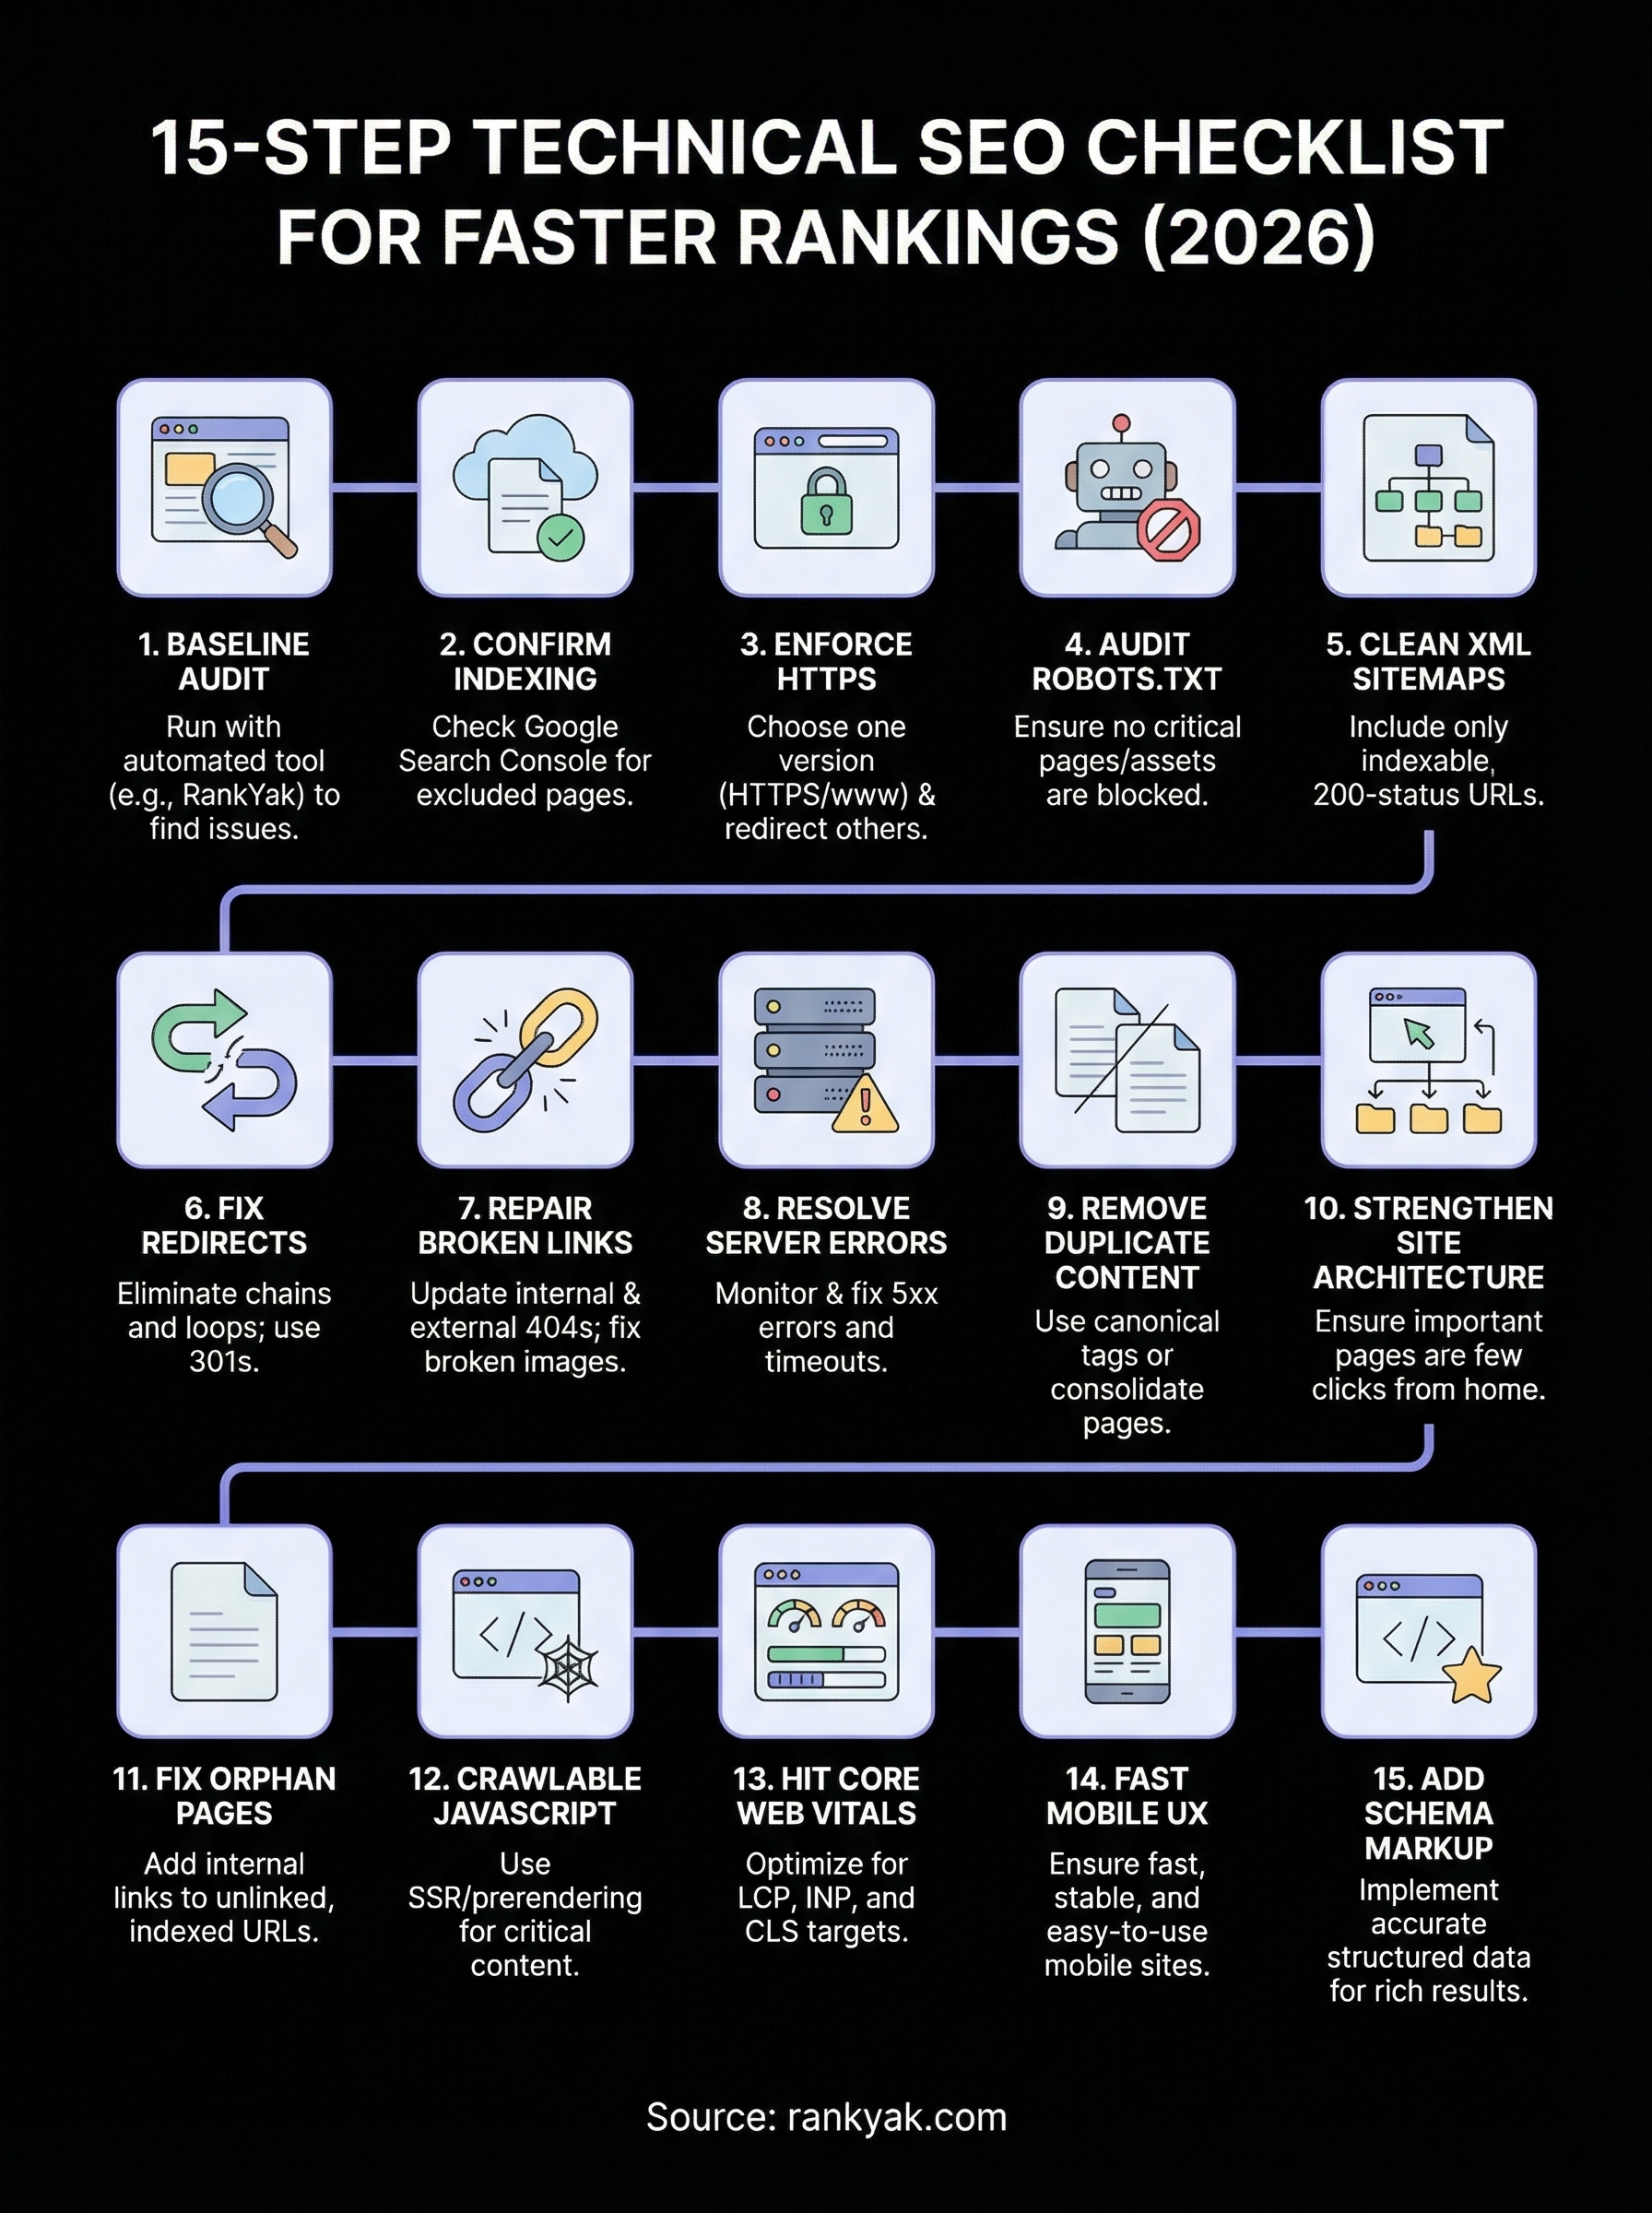
15-Step Technical SEO Checklist for Faster Rankings (2026)

You can publish the best content on the internet, but if search engines can't crawl, render, or index your pages properly, none of it will rank. That's the uncomfortable truth behind most stalled SEO campaigns, and exactly why a technical SEO checklist matters more than ever heading into 2026. Technical issues are silent killers that bury pages without warning.
The good news: most technical SEO problems are fixable once you know where to look. From crawl errors and broken sitemaps to slow Core Web Vitals and misconfigured robots.txt files, each fix removes friction between your content and Google's ability to rank it. A structured audit process turns what feels overwhelming into a repeatable system you can run quarterly, or even automate.
At RankYak, we build SEO-optimized content designed to rank, but we know firsthand that great content needs a solid technical foundation underneath it. That's why we put this guide together. Below, you'll find a 15-step technical SEO checklist covering crawlability, indexing, site speed, mobile-friendliness, structured data, and more, each step actionable, each one tied to real ranking impact.
1. Run a baseline technical audit with RankYak
Before you fix anything, you need a clear picture of where your site stands. A baseline audit gives you that starting point, and running it through RankYak means you're not manually combing through hundreds of URLs with spreadsheets. RankYak's automated scan pulls together crawl data, indexing signals, and content health in one place, so you can work from a prioritized list instead of guessing.
What to set up first
Connect your website to RankYak and link your Google Search Console account before you run the first scan. This integration pulls in real-world data about which pages Google has already found, what errors it's reporting, and where coverage gaps exist. Without this connection, your audit only reflects what a bot can see, not what Google actually indexes from your site.
Once connected, run a full site crawl. Make sure you're crawling with a user agent that mirrors Googlebot, so the results reflect what the search engine actually encounters. Set your crawl to include subdomains, pagination, and parameter URLs if your site uses them, because these areas generate the most technical debt over time.
What issues to prioritize from the first scan
Not every issue your scan surfaces carries the same weight. Focus first on crawl errors and indexing blocks, since these prevent Google from reaching your content entirely. A page that returns a 404 or gets blocked by robots.txt contributes nothing to your rankings regardless of how well it's written or optimized.
Fix anything that stops Google from crawling or indexing your pages before you spend time on any on-page optimization.
After those critical errors, move to duplicate content flags and missing canonical tags, which confuse search engines about which version of a page to rank. Structured data errors and slow-loading pages come next. This priority order is built into any solid technical SEO checklist, and following it keeps you from wasting effort on low-impact fixes while bigger problems remain unresolved.
How to track fixes over time
Create a simple tracking log the moment you start resolving issues. Record the URL, the problem type, the fix applied, and the date it was resolved. This matters because some fixes take weeks to show up in Search Console, and without a log you won't know which changes drove which improvements.
Re-run your scan every month and compare it against your previous baseline snapshot. RankYak surfaces new issues as your site grows, so monthly audits catch problems before they compound and set back the progress you've already made.
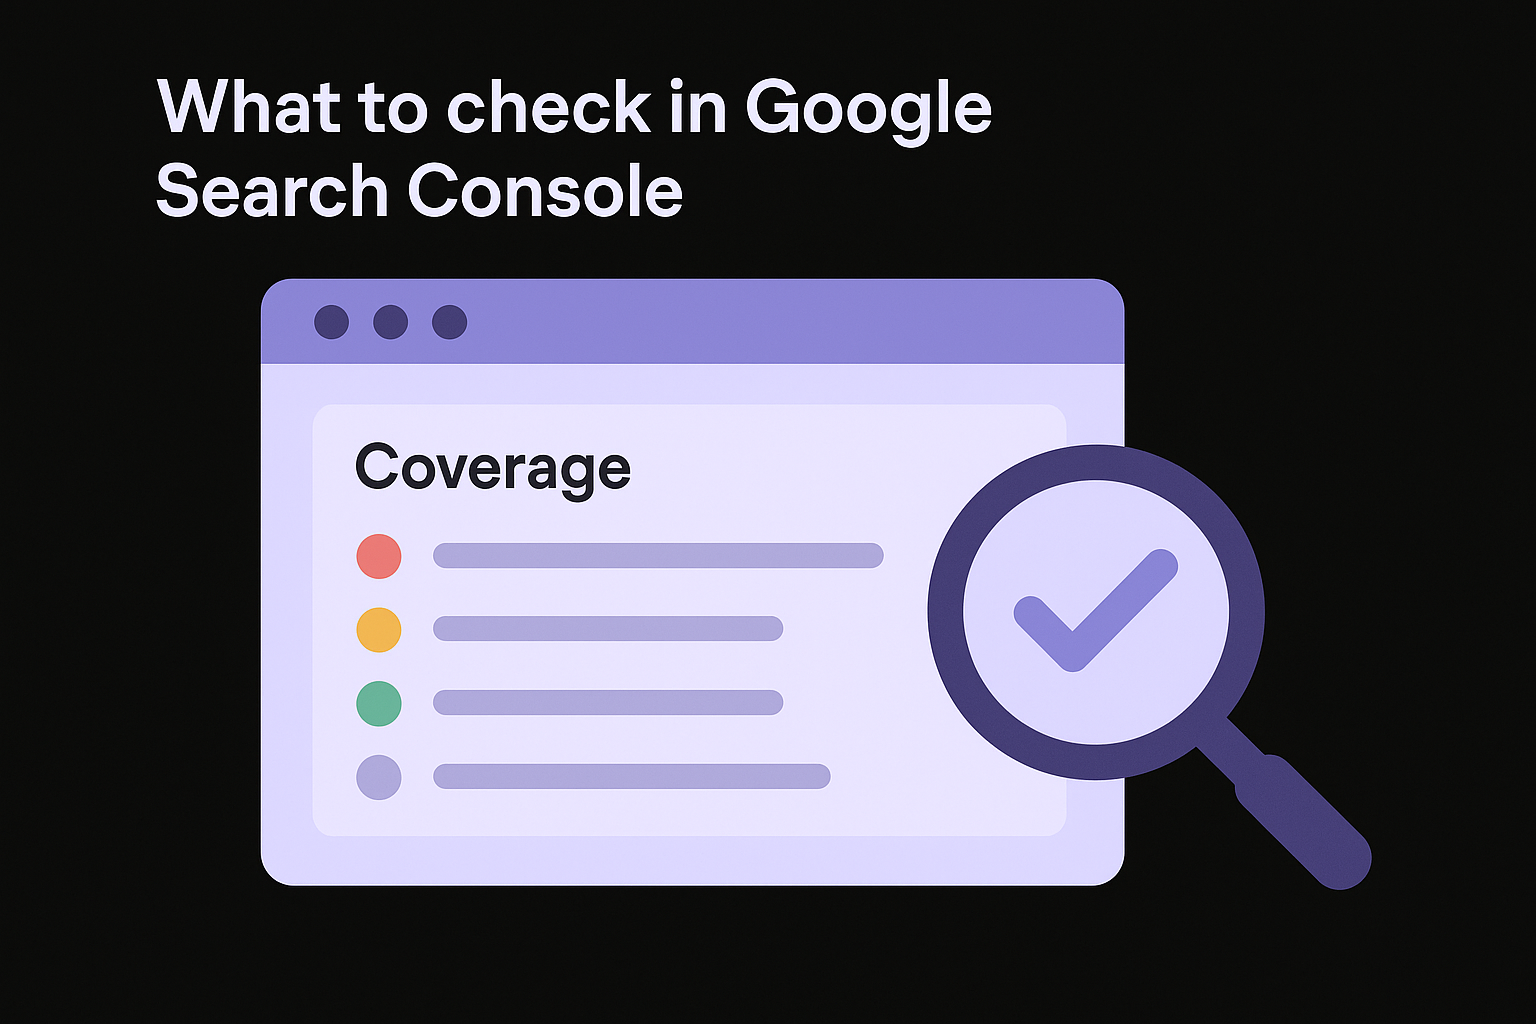
2. Confirm Google can index your important pages
Indexing is the foundation of every technical SEO checklist. If Google cannot index your pages, none of your other optimizations matter. Before you optimize speed, structured data, or internal linking, you need to confirm that your most important URLs are actually in Google's index and accessible to crawlers.
What to check in Google Search Console
Open Google Search Console and navigate to the Coverage or Indexing report. This report breaks your pages into four categories: error, valid with warnings, valid, and excluded. Pay close attention to the excluded bucket, since many site owners ignore it, assuming those pages are fine. Pages excluded due to "noindex" tags, crawl anomalies, or soft 404s are invisible to Google regardless of how well they're written.
A page sitting in the excluded category generates zero organic traffic, no matter how well you've optimized the content on it.
How to fix common indexing exclusions
Each exclusion reason requires a different fix. If pages are marked "Excluded by noindex tag," check your CMS settings and page-level meta robots tags for unintentional directives. If pages appear as "Discovered but not indexed," Google found the URL but chose not to crawl it, often because of low perceived value, thin content, or crawl budget issues. Consolidate these pages or strengthen their internal linking to signal importance.
How to request validation and reindexing
After you fix an exclusion issue, paste the affected URL into the Search Console URL Inspection tool and click "Request Indexing." For larger batches of fixed pages, resubmit your XML sitemap directly within Search Console to prompt a fresh crawl across the corrected URLs.
3. Choose one site version and enforce HTTPS
Your site can accidentally exist as four separate versions: HTTP, HTTPS, www, and non-www. Search engines treat each variation as a distinct URL, which splits your link equity and crawl budget across all four instead of concentrating it on the version you want to rank. Picking one preferred version and enforcing it sitewide is a non-negotiable step in any technical SEO checklist.
What to check for duplicate site versions
Open your browser and manually test all four homepage variations. If each one loads without redirecting to a single URL, you have a duplication problem that needs immediate attention. Check these four combinations specifically:
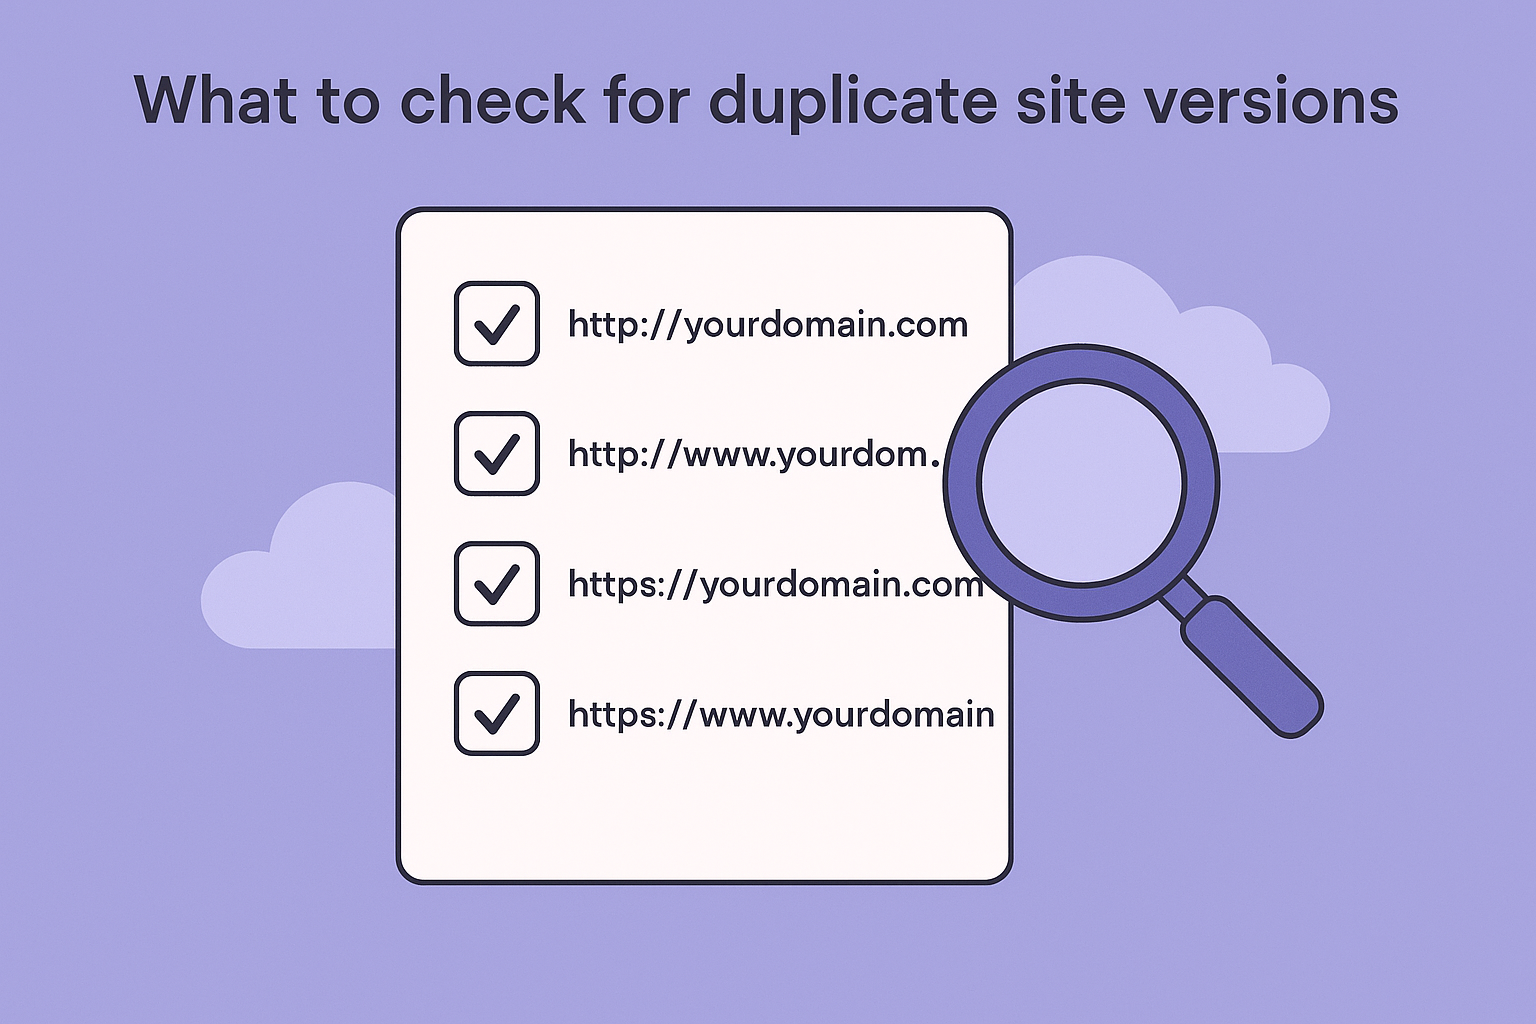
Use Google Search Console to see which URL variants Google has crawled and whether it's mixing versions across your coverage reports.
How to fix with 301 redirects and canonicals
Configure 301 redirects at the server level to route all non-preferred versions to your single chosen URL. If you've chosen HTTPS with www, redirect all HTTP and non-www traffic there permanently. Add a canonical tag to every page pointing to the HTTPS version to reinforce the signal with search engines.
Relying only on canonical tags without a server-level redirect is not a complete fix, since crawlers can still follow and index the wrong version.
How to confirm the preferred domain is consistent
After setting your redirects, verify them using your browser's developer tools. Check that every internal link already uses the preferred domain format and that your XML sitemap lists only HTTPS URLs.
Set your preferred domain inside Google Search Console to remove any remaining ambiguity for Google's crawlers going forward.
4. Audit robots.txt and meta robots tags
Your robots.txt file and meta robots tags act as the gatekeepers to your site. When either is misconfigured, you can accidentally block Google from crawling the pages you most want to rank, making this audit a critical item in any technical SEO checklist.
What to check in robots.txt and page-level directives
Access your robots.txt file by typing yourdomain.com/robots.txt directly into your browser. Look for any Disallow rules that block important sections like /blog, /products, or your entire site with a wildcard. Also check individual pages for <meta name="robots" content="noindex"> tags, which can creep in through CMS plugins, staging environments, or developer settings left active after launch.
A single misplaced noindex tag on a category page can quietly remove hundreds of URLs from Google's index without triggering any visible error.
How to avoid blocking critical pages and assets
Beyond page content, Google needs to render your CSS and JavaScript to understand how your pages look and behave. Check your robots.txt for any Disallow rules targeting resource folders like /wp-content/ or /assets/. Blocking these prevents Google from rendering your pages correctly, which can lead to ranking drops even when your content is fully indexed.
Keep your robots.txt focused and minimal. Block only what you genuinely don't want crawled, such as admin sections, internal search results, or duplicate parameter URLs.
How to test access with live URL checks
Use the Google Search Console URL Inspection tool to test specific pages and confirm whether Google can access them. The tool shows you exactly what Googlebot sees, including any crawl blocks from robots.txt or page-level directives, so you can catch and fix access issues before they affect your rankings.
5. Build clean XML sitemaps and keep them current
Your XML sitemap is the roadmap Google uses to discover and prioritize your pages. Without a well-structured, up-to-date sitemap, crawlers may miss new content or waste budget on URLs that no longer serve your site. Keeping your sitemap accurate is a straightforward but high-impact step in any technical SEO checklist.
What pages belong in your sitemap
Include only canonical, indexable URLs in your sitemap. That means no noindex pages, redirect URLs, duplicate parameter variations, or broken pages. Every URL listed should return a 200 status code and carry a canonical tag pointing back to itself. Submitting anything else clutters your sitemap and signals poor site hygiene to crawlers.
Only include pages you actually want Google to index, since every low-quality or duplicate URL you submit wastes crawl budget that could go toward your best content.
How to handle large sites with sitemap indexes
If your site contains more than 50,000 URLs or covers distinct content types like blog posts, products, and landing pages, use a sitemap index file to organize everything. A sitemap index is a master file that references separate, category-specific sitemaps. This structure keeps individual sitemaps lean and makes it far easier to isolate indexing gaps by content type when something goes wrong.
How to confirm sitemap health in Search Console
Submit your sitemap URL inside Google Search Console under the Sitemaps report. Search Console displays how many URLs you submitted versus how many Google actually indexed, and that gap often reveals serious crawl or content quality problems. Check this report monthly and update your sitemap file whenever you publish or remove significant pages to keep Google's picture of your site accurate.
6. Fix redirect chains, loops, and wrong status codes
Redirects exist to move link equity from old URLs to new ones, but when they stack up or point at each other, they create crawl inefficiency and ranking signal loss that compounds over time. Cleaning up your redirect structure is a critical step in any solid technical SEO checklist, and it's one of the fastest wins you can achieve with a basic crawl tool.
What to check with a crawl
Run a full site crawl and filter results by redirect status codes (301, 302, 307, 308). Look for chains longer than one hop, meaning a URL redirects to another URL that redirects again before reaching the final destination. Also scan for redirect loops, where URL A redirects to URL B, which redirects back to URL A, trapping both crawlers and users in a cycle that never resolves.
Every additional redirect hop in a chain bleeds link equity and adds unnecessary latency before the browser reaches the actual page.
How to simplify redirects and preserve equity
Update each multi-hop chain so the original URL points directly to the final destination in a single 301 redirect. Remove any temporary 302 redirects pointing to pages that have permanently moved, since 302s do not reliably pass full link equity the way 301s do. Audit your redirect map quarterly to catch new chains before they build up.
How to confirm final URLs return the right codes
After updating your redirects, use your browser's developer tools or a header checker to verify that each original URL resolves to the correct final destination with a clean 200 status code. Confirm that no destination URL returns a 404, 500, or another redirect, and recheck your crawl report to clear any remaining flagged chains.
7. Repair broken internal links and risky outbound links
Broken links damage your crawl efficiency and user experience at the same time. When Googlebot follows an internal link and hits a 404, it wastes crawl budget and loses the link equity that should have flowed to a live page. This step in your technical SEO checklist fixes both problems fast.
What to check for 404s and broken destinations
Run your crawl tool and filter for internal links pointing to 4xx responses. These are pages your site actively directs users and crawlers toward that no longer exist. Also check for broken image src attributes, since missing images reduce page quality signals and hurt user experience even when the surrounding text loads correctly.
A 404 destination on a high-traffic internal page silently drains link equity away from the pages that need it most.
How to fix internal links, external links, and images
Update each broken internal link to point to the correct live URL or the nearest relevant replacement. For external links pointing to dead destinations, either remove the link or replace it with an authoritative live source that serves the same purpose. Broken image links need updated file paths or replacement images uploaded to the correct directory.
How to prevent broken links from piling up again
Set up a monthly crawl schedule so new broken links get caught before they accumulate. When you delete or move a page, immediately update every internal link pointing to that URL rather than relying solely on a redirect. Building this cleanup habit into your publishing workflow keeps your link graph clean and prevents small issues from stacking into larger crawl problems over time.
8. Resolve server errors and reliability issues
Server errors are one of the most damaging issues you can face in your technical SEO checklist because they affect real users and crawlers simultaneously. A 5xx error means your server failed to fulfill a request, and when Googlebot hits one repeatedly on important pages, it pulls back its crawl frequency and can eventually drop those pages from the index.
What to check for 5xx errors and timeouts
Open Google Search Console and check the Coverage report for pages flagged with server errors. Pull your server access logs to see how often Googlebot requests return 5xx responses versus 200s, paying particular attention to timeout patterns that signal your server is struggling under load rather than failing outright.
Repeated 5xx responses train Googlebot to crawl your site less frequently, which slows discovery of new content and delays ranking improvements.
How to narrow down root causes with logs and hosting
Contact your hosting provider and share the specific timestamps of error spikes you identify in your logs. The error type itself narrows your search significantly:
- 500 points to an application-level failure, often a plugin or script conflict
- 502/504 suggest a gateway or upstream timeout issue
- 503 indicates your server is temporarily overloaded or in maintenance mode
How to confirm stability for users and crawlers
Set up an uptime monitoring service to track your site's availability around the clock. After resolving the root cause, monitor your server response codes for at least two to four weeks to confirm the fix holds under real traffic conditions.
Re-check your Search Console Coverage report to verify previously flagged pages now return clean 200 statuses. If errors return intermittently, escalate to your hosting provider before they compound into a broader crawl budget problem.
9. Remove duplicate and near-duplicate content
Duplicate content confuses search engines about which version of a page to rank, splitting your link equity and ranking signals across multiple URLs instead of concentrating them on one authoritative version. This step in your technical SEO checklist catches both exact duplicates and near-duplicates that differ only slightly in wording, structure, or metadata.
What to check for duplication sources
Common duplication sources include URL parameters that generate separate pages for the same content (like /products?color=blue), pagination variations, HTTP vs. HTTPS versions you missed in step 3, and print-friendly page variants. Run a full crawl and filter for pages sharing identical or highly similar title tags and body content across multiple URLs. Your crawl tool will surface these as near-duplicate clusters that need immediate attention.
How to fix with canonicals, redirects, and consolidation
For parameter-based duplicates, add a canonical tag on each variant pointing back to the primary URL. For near-duplicate pages that cover the same topic with only thin differences between them, consolidate them into one comprehensive page and 301-redirect the weaker versions. Canonicals tell Google which URL to credit with ranking signals; redirects remove the duplicate from circulation entirely and push all equity to the destination.
Use 301 redirects when you want to eliminate a duplicate URL permanently, and canonical tags when the variant URL must remain accessible but you want ranking credit consolidated on a single page.
How to confirm Google selects the right canonical
Paste each primary URL into the Google Search Console URL Inspection tool and check the "Google-selected canonical" field. If Google picks a different URL than your declared canonical, it is overriding your tag, which usually signals thin content, weak internal linking, or conflicting signals pointing crawlers toward the wrong version.
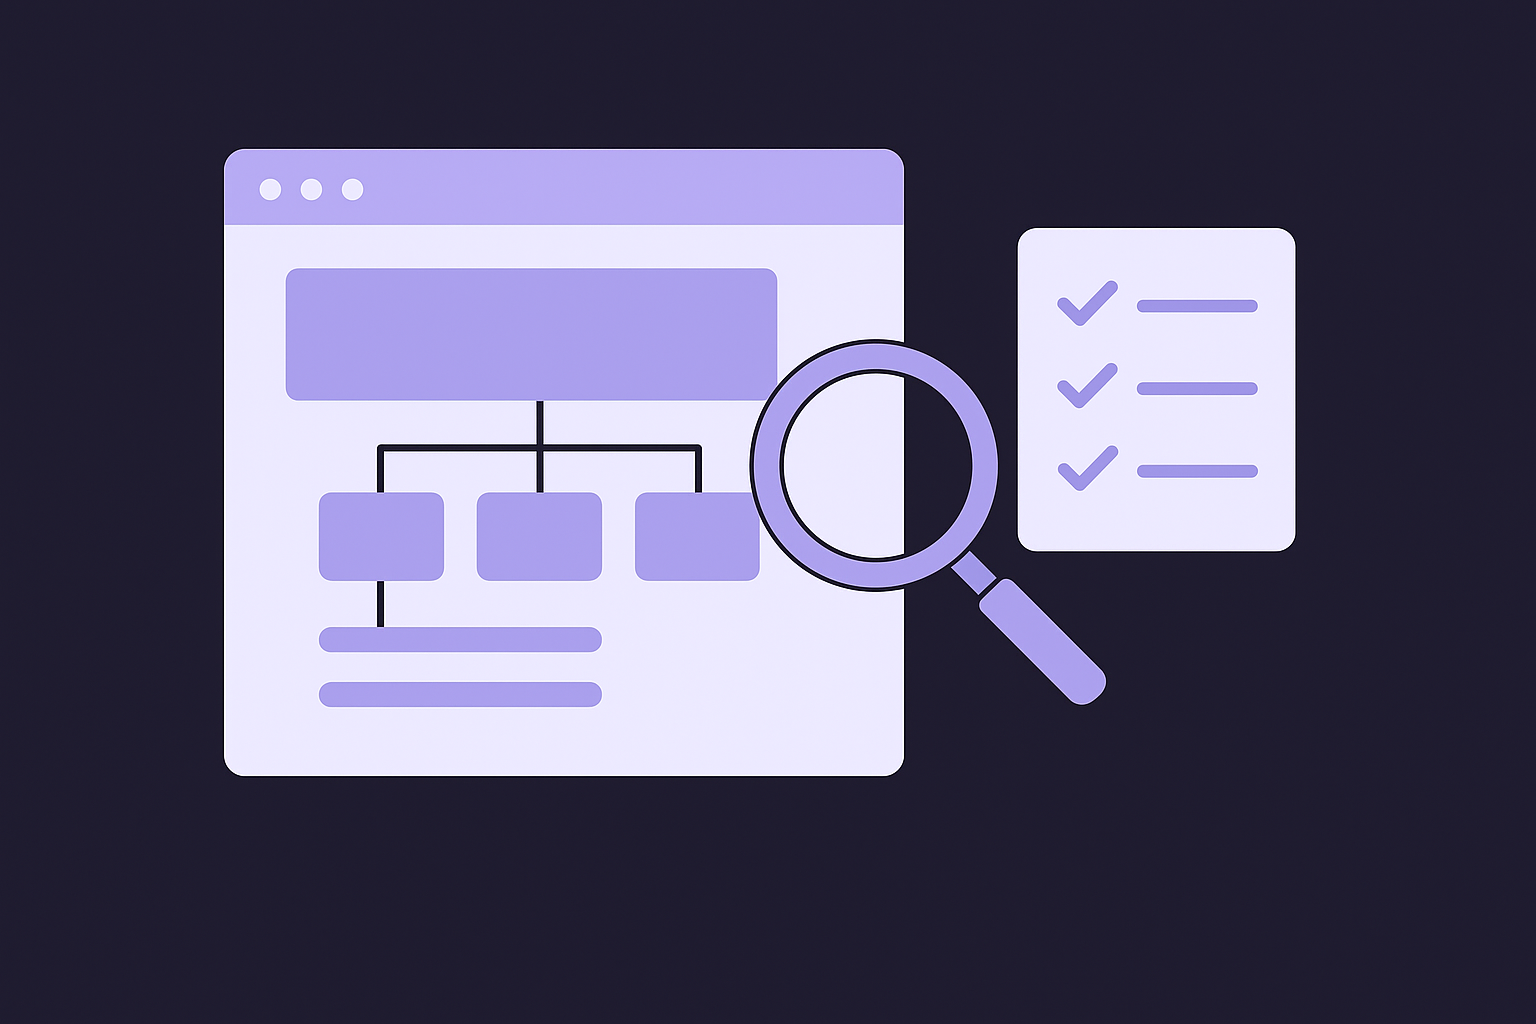
10. Strengthen site architecture and internal linking
Your site architecture determines how efficiently crawl budget flows through your pages and how clearly search engines understand which content matters most. A flat, logical structure keeps your best pages within a few clicks of the homepage and signals their importance through the sheer volume of internal links pointing at them. This step sits near the middle of your technical SEO checklist for good reason: fixing crawl issues means nothing if link equity has nowhere useful to flow.
What to check for depth, hubs, and navigation clarity
Run a crawl and note how many clicks it takes to reach your most important pages from the homepage. Pages buried four or more levels deep receive less crawl attention and rank slower. Look for navigation menus that skip content categories entirely, leaving whole sections of your site disconnected from the main flow.
Pages that sit more than three clicks from your homepage are harder for crawlers to prioritize, regardless of their content quality.
How to build topic clusters that crawlers understand
Group related pages around a central pillar page that covers a broad topic, then link all supporting pages back to it and to each other where relevant. This cluster structure tells crawlers that your site covers a topic in depth, which concentrates topical authority on the pillar page and lifts the rankings of supporting content alongside it.
How to confirm important pages get crawled and ranked
Check your crawl frequency data inside Google Search Console to see which pages Googlebot visits most often. Pages with strong internal linking get crawled more frequently. If a high-value page shows low crawl activity, add contextual internal links from related high-traffic pages to increase the signal pointing toward it.
11. Find and fix orphan pages
Orphan pages are live, indexable URLs that no other page on your site links to internally. Without internal links pointing at them, crawlers find these pages only through your XML sitemap or external backlinks, which means they get crawled infrequently and accumulate very little ranking authority regardless of their content quality. Fixing orphan pages is a straightforward but commonly skipped item in any technical SEO checklist.
What to check for pages with no internal links
Pull your full list of indexed URLs from Google Search Console and cross-reference it against the internal link data from your crawl tool. Any URL that appears in your index but shows zero incoming internal links is an orphan. Pay particular attention to blog posts, landing pages, and product pages added during site migrations or rushed publishing sprints, since those scenarios create orphans most frequently.
An orphan page sitting in your index with no internal links pointing to it will rarely rank, because crawlers treat low-connectivity pages as low priority.
How to add the right links without spamming
For each orphan, identify two or three related pages already in your site architecture and add a contextual internal link from each one. The anchor text should describe what the destination page covers clearly and naturally. Avoid adding links in bulk batches on unrelated pages just to connect orphans fast, since forced links hurt content quality and confuse topical signals.
How to confirm discovery and indexing improve
After adding internal links, use the Google Search Console URL Inspection tool to request reindexing for each previously orphaned page. Monitor your crawl data over the following four weeks to confirm Googlebot visits those URLs more frequently and that coverage status shifts from excluded to valid.
12. Make JavaScript and critical resources crawlable
JavaScript-heavy sites create a specific problem that most technical SEO checklist guides overlook: Googlebot crawls a page's HTML first and renders JavaScript in a second wave, sometimes days later. If your critical content or links live inside JavaScript components that Google can't access or chooses to defer, those elements are effectively invisible until rendering happens, and ranking is delayed as a result.
What to check for rendering gaps and blocked assets
Start by running your key URLs through the Google Search Console URL Inspection tool and comparing the "Page fetch" view with what your browser shows. Differences between the two reveal content that relies on JavaScript Google hasn't rendered yet. Also check your robots.txt for rules that block JavaScript files or CSS resources, since rendering failures often trace back to blocked asset folders rather than the JavaScript itself.
If your navigation menus, product descriptions, or internal links only appear after JavaScript executes, Google may crawl your site without seeing any of them.
How to fix with SSR, prerendering, and crawl-friendly setup
Switch critical content and links to server-side rendering (SSR) or use a prerendering solution so Googlebot receives fully built HTML on the first request. For frameworks like React or Vue, configure static generation for high-priority pages to eliminate rendering delays entirely. Where full SSR is not practical, ensure at minimum that your main navigation links and core body content exist in the raw HTML response.
How to confirm Google sees the full content
Re-inspect your key URLs in Search Console after implementing your rendering fixes and compare the rendered screenshot against your live page. Confirm that all primary content, links, and structured data appear in the rendered view before moving on to the next step.
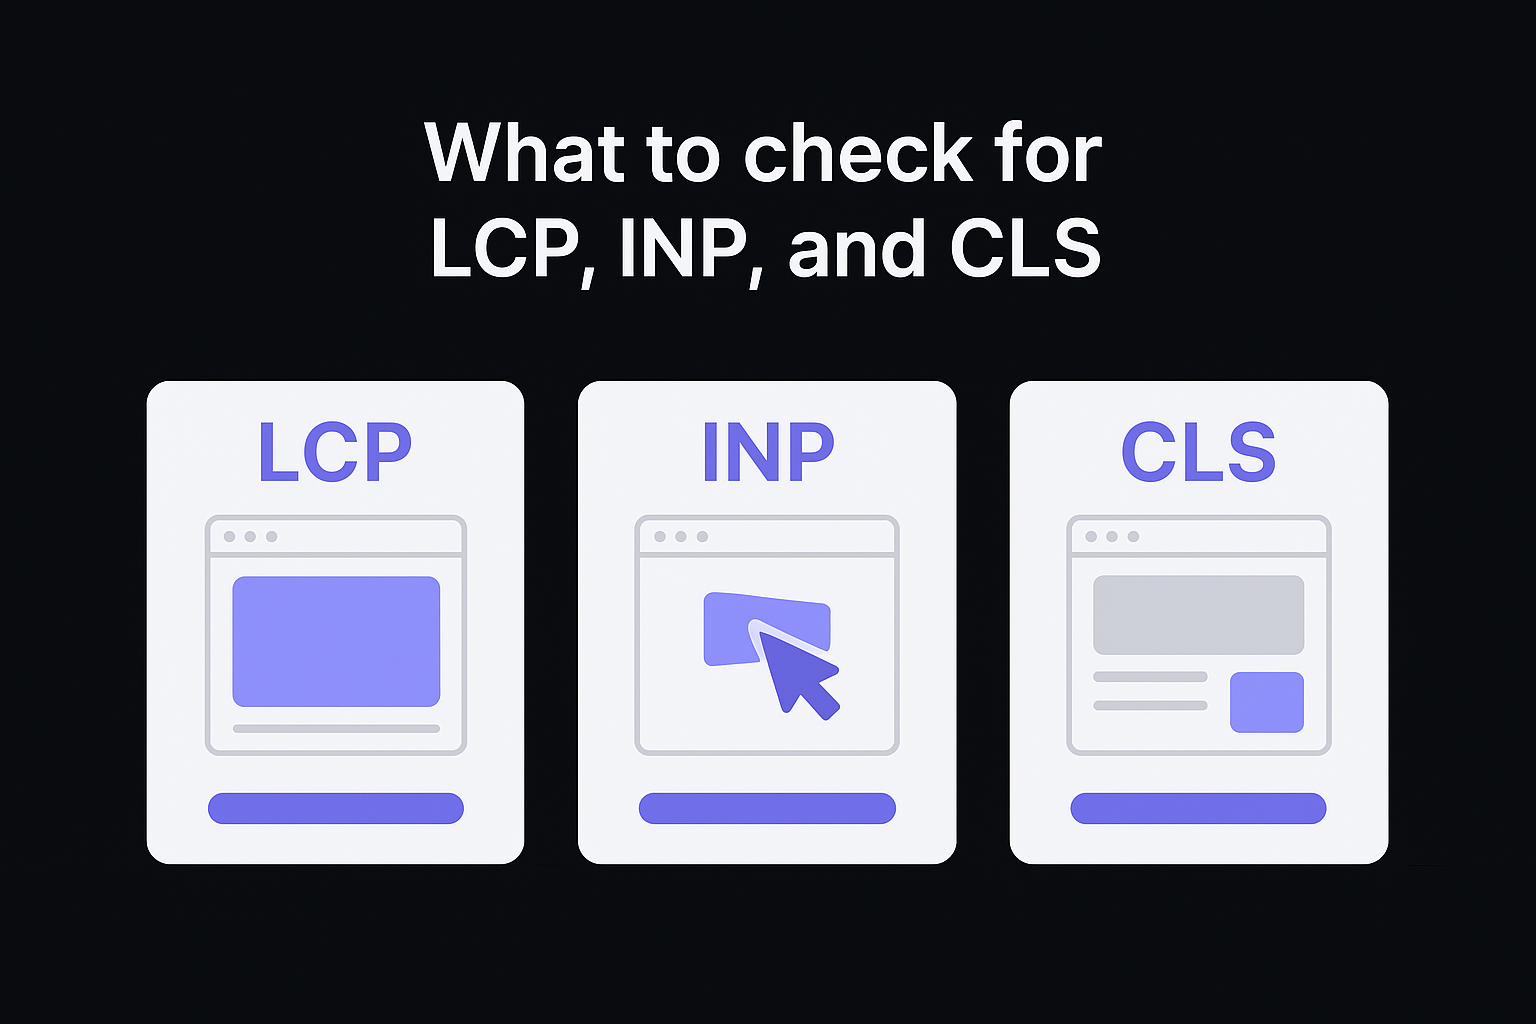
13. Hit Core Web Vitals targets for 2026
Core Web Vitals are Google's page experience signals, and they directly influence how your pages compete in search results. No technical SEO checklist is complete without addressing them, since a site that loads slowly, shifts layout unexpectedly, or responds sluggishly to input gives users a poor experience that Google's ranking systems now factor in explicitly.
What to check for LCP, INP, and CLS
Run your key URLs through Google PageSpeed Insights to pull both field data and lab data for the three metrics that matter: Largest Contentful Paint (LCP), Interaction to Next Paint (INP), and Cumulative Layout Shift (CLS). Target LCP under 2.5 seconds, INP under 200 milliseconds, and CLS under 0.1 to stay in the "Good" threshold Google uses as a ranking signal.
Field data from real users carries more weight in Google's systems than lab data, so always check the Chrome User Experience Report values first.
How to fix common causes for each metric
Slow LCP usually traces back to unoptimized hero images, render-blocking resources, or slow server response times. Fix it by compressing images, serving them in modern formats like WebP, and preloading your largest above-the-fold element. Poor INP often comes from heavy JavaScript execution blocking the main thread, so defer non-critical scripts and break up long tasks. High CLS typically results from images without defined dimensions or ads and embeds injected above existing content.
How to confirm improvements with field and lab data
After implementing fixes, re-test each page in Google PageSpeed Insights and check the Core Web Vitals report inside Google Search Console for site-wide field data trends. Field data updates on a 28-day rolling window, so allow at least four weeks before evaluating whether your improvements have carried over into real-user measurements.
14. Make mobile UX fast, stable, and easy to use
Google uses mobile-first indexing, which means the mobile version of your site is what Google actually evaluates for rankings. If your mobile experience lags behind your desktop version in speed, layout, or usability, your rankings reflect that gap directly. This step in your technical SEO checklist addresses the most common mobile issues that quietly suppress performance across your entire site.
What to check on real devices
Open your site on multiple real devices, not just browser emulators, and navigate through your most important pages as a user would. Look for text that requires horizontal scrolling, buttons that are too small to tap accurately, and content that shifts or overflows its container on smaller screens. Also run your key URLs through Google PageSpeed Insights to pull mobile-specific scores separate from your desktop results.
A site that scores well on desktop but poorly on mobile sends Google a direct signal to rank it lower, since mobile is the primary index.
How to fix mobile layout, tap targets, and intrusive overlays
Set all tap targets to at least 48x48 pixels with adequate spacing between them so users can interact without misfiring. Remove any interstitials or overlays that cover the main content on load, since Google penalizes these when they block the primary page content from mobile visitors immediately after arriving from search results. Compress and properly size all images served to mobile viewports to prevent layout shifts and slow load times.
How to confirm mobile-first parity with desktop
Compare your mobile and desktop rendered views inside the Google Search Console URL Inspection tool side by side. Every piece of content, every internal link, and every structured data element visible on desktop must also appear in the mobile-rendered version to avoid indexing gaps that hurt your rankings.
15. Add schema markup that matches page intent
Schema markup tells search engines exactly what your content means, not just what it says. Without it, Google has to infer context from text alone, which increases the chance of your pages being misrepresented in search results. Adding accurate structured data is the final step in this technical SEO checklist and one of the most direct ways to qualify your pages for rich results like review stars, FAQ snippets, and product carousels.
What to check for missing or incorrect structured data
Start by identifying which pages on your site currently have no schema markup at all. Product pages need Product schema, articles need Article schema, local businesses need LocalBusiness schema, and FAQ sections need FAQPage schema. Mismatched markup is just as harmful as missing markup, since applying Article schema to a product page gives Google conflicting signals about what the page actually offers.
Schema that contradicts the visible content on a page violates Google's structured data guidelines and can result in manual actions against your site.
How to implement and keep schema consistent sitewide
Add schema directly in the HTML as JSON-LD, which Google recommends because it keeps your structured data separate from your visible content and easy to update. For CMS platforms like WordPress, plugins can generate schema automatically, but always review the output against your actual page content to confirm every required property is populated correctly and reflects what users see.
How to validate with rich results testing tools
Use Google's Rich Results Test to validate your structured data after implementation. The tool flags missing required fields and invalid values that would prevent your pages from qualifying for enhanced search features. Re-test every time you update your schema or make significant content changes to keep your markup valid.
Next steps
Working through this technical SEO checklist gives you a repeatable system for finding and fixing the issues that hold your site back in search. Each step builds on the last, from clearing crawl blocks and confirming indexing to hitting Core Web Vitals targets and wiring up accurate schema markup. The sites that rank consistently in 2026 are the ones that treat technical health as an ongoing process, not a one-time fix.
Running monthly audits, tracking your fixes, and republishing a stronger content foundation are all easier when you have the right tools behind you. RankYak automates the SEO work that eats your time, from keyword research and article creation to publishing and backlink building, so your technical improvements actually lead to content Google can find and rank. If you want a faster path to consistent organic growth, start your free trial with RankYak and let the platform handle the heavy lifting while you focus on running your business.

Get Google and ChatGPT traffic on autopilot.
Start today and generate your first article within 15 minutes.

SEO revenue calculator
How much revenue is your website leaving on the table?
Take a quick quiz and see exactly how much organic revenue you're missing out on, along with personalized tips to fix it.
-
4 questions, under 1 minute
-
See traffic and revenue potential
-
No email required
Free · takes 1 minute · no signup needed
Question 1 of 4
Question 2 of 4
Question 3 of 4
Question 4 of 4
Your SEO growth potential
Extra visitors / month
after 6-12 months of consistent publishing
Revenue potential / year
at your niche's avg. conversion rate
Articles needed (12 mo)
to reach this traffic level
ROI with RankYak
on the Professional plan ($129/mo)
To hit that number, you'd need to:
- Build a topical authority strategy for your niche
- Research keywords & map out a full topical cluster
- Write, edit & publish an article every single day
- Build backlinks to the articles you publish
RankYak handles all of this automatically, every day.
* Estimates based on industry averages. Results vary by niche, competition, and domain authority. Most SEO results become visible after 3-6 months of consistent publishing.