Asana Content Calendar: Set Up A Simple Editorial Workflow

Managing a content pipeline without a system is like juggling blindfolded, you'll drop something, and it's usually the piece that matters most. An Asana content calendar gives your team a single place to plan, assign, track, and publish content without the chaos of scattered spreadsheets and forgotten deadlines. But setting one up the right way takes more than dragging a few tasks onto a board.
Whether you're a solo founder or running a small marketing team, editorial consistency is what separates sites that rank from sites that stall. You need to know what's being written, who's responsible, when it goes live, and how it fits into your broader SEO strategy. Asana can handle the workflow side of that equation, organizing your pipeline, keeping contributors accountable, and making sure nothing slips through the cracks.
Of course, even the best calendar won't help if you're struggling to fill it. That's where tools like RankYak come in, automating keyword research, article creation, and publishing on autopilot so your calendar stays full without burning hours on production. Pair that kind of output with a well-structured Asana workflow, and you've got a content engine that actually runs.
This guide walks you through setting up a practical content calendar in Asana from scratch, covering project structure, custom fields, views, templates, and the integrations that tie everything together. By the end, you'll have a repeatable editorial workflow that keeps your content moving from idea to published post without the usual bottleneck.
What an Asana content calendar is
An Asana content calendar is a structured project inside Asana that maps every content asset to a publish date, a responsible team member, and a production stage. Unlike a basic to-do list, it gives you a bird's-eye view of your entire content pipeline across days, weeks, or months, so you can spot gaps, prevent deadline collisions, and see at a glance what's in progress versus what's ready to ship. Think of it as your editorial command center built inside a project management tool your team already uses.
The key difference between a content calendar and a task list is visibility: a calendar shows you what's happening across time, not just what needs to get done.
How it differs from a simple task list
A standard Asana task list tells you what to do. A content calendar tells you when to do it, who owns it, and how it connects to everything else you're publishing. That shift in framing changes how your team plans and prioritizes. Instead of reacting to whoever shouts the loudest, you work from a shared source of truth that keeps every contributor aligned.
Here's a quick comparison of what each approach covers:
| Feature | Basic task list | Asana content calendar |
|---|---|---|
| Publish date visibility | No | Yes (Timeline and Calendar views) |
| Content status tracking | Limited | Full workflow stages |
| Assignee clarity | Task-level only | Per stage, per asset |
| Channel and format tracking | No | Yes (via custom fields) |
| Repeatable templates | No | Yes (task templates) |
| Cross-team dependency mapping | No | Yes (dependencies and rules) |
What Asana brings to editorial work
Asana's strength for content teams comes from its flexible view options and automation layer. You can switch between a Calendar view to see what's publishing on any given day, a Timeline view to track production dependencies, and a Board view to manage status columns like "In Brief," "In Draft," and "Ready to Publish." Each view pulls from the same set of tasks, so switching views never duplicates your work or creates sync issues.
Beyond views, Asana lets you build custom fields, task templates, and automated rules that turn your content calendar from a planning document into an active workflow engine. For example, you can set a rule that automatically assigns a task to your editor the moment a writer marks their draft complete. These automations remove the manual follow-up that bogs down most editorial teams and keeps content moving without anyone needing to check in constantly.
Who benefits most from this setup
Content calendars in Asana work well for any team that publishes on a regular cadence, whether that's a solo marketer publishing two blog posts a week or a five-person team managing a blog, email newsletter, and social content simultaneously. The setup scales because Asana's structure stays the same regardless of volume. You add tasks, not new systems. If you're managing multiple channels or multiple contributors, the calendar view and custom fields become even more valuable because they eliminate the "who's doing what and when" conversations that eat up meeting time.
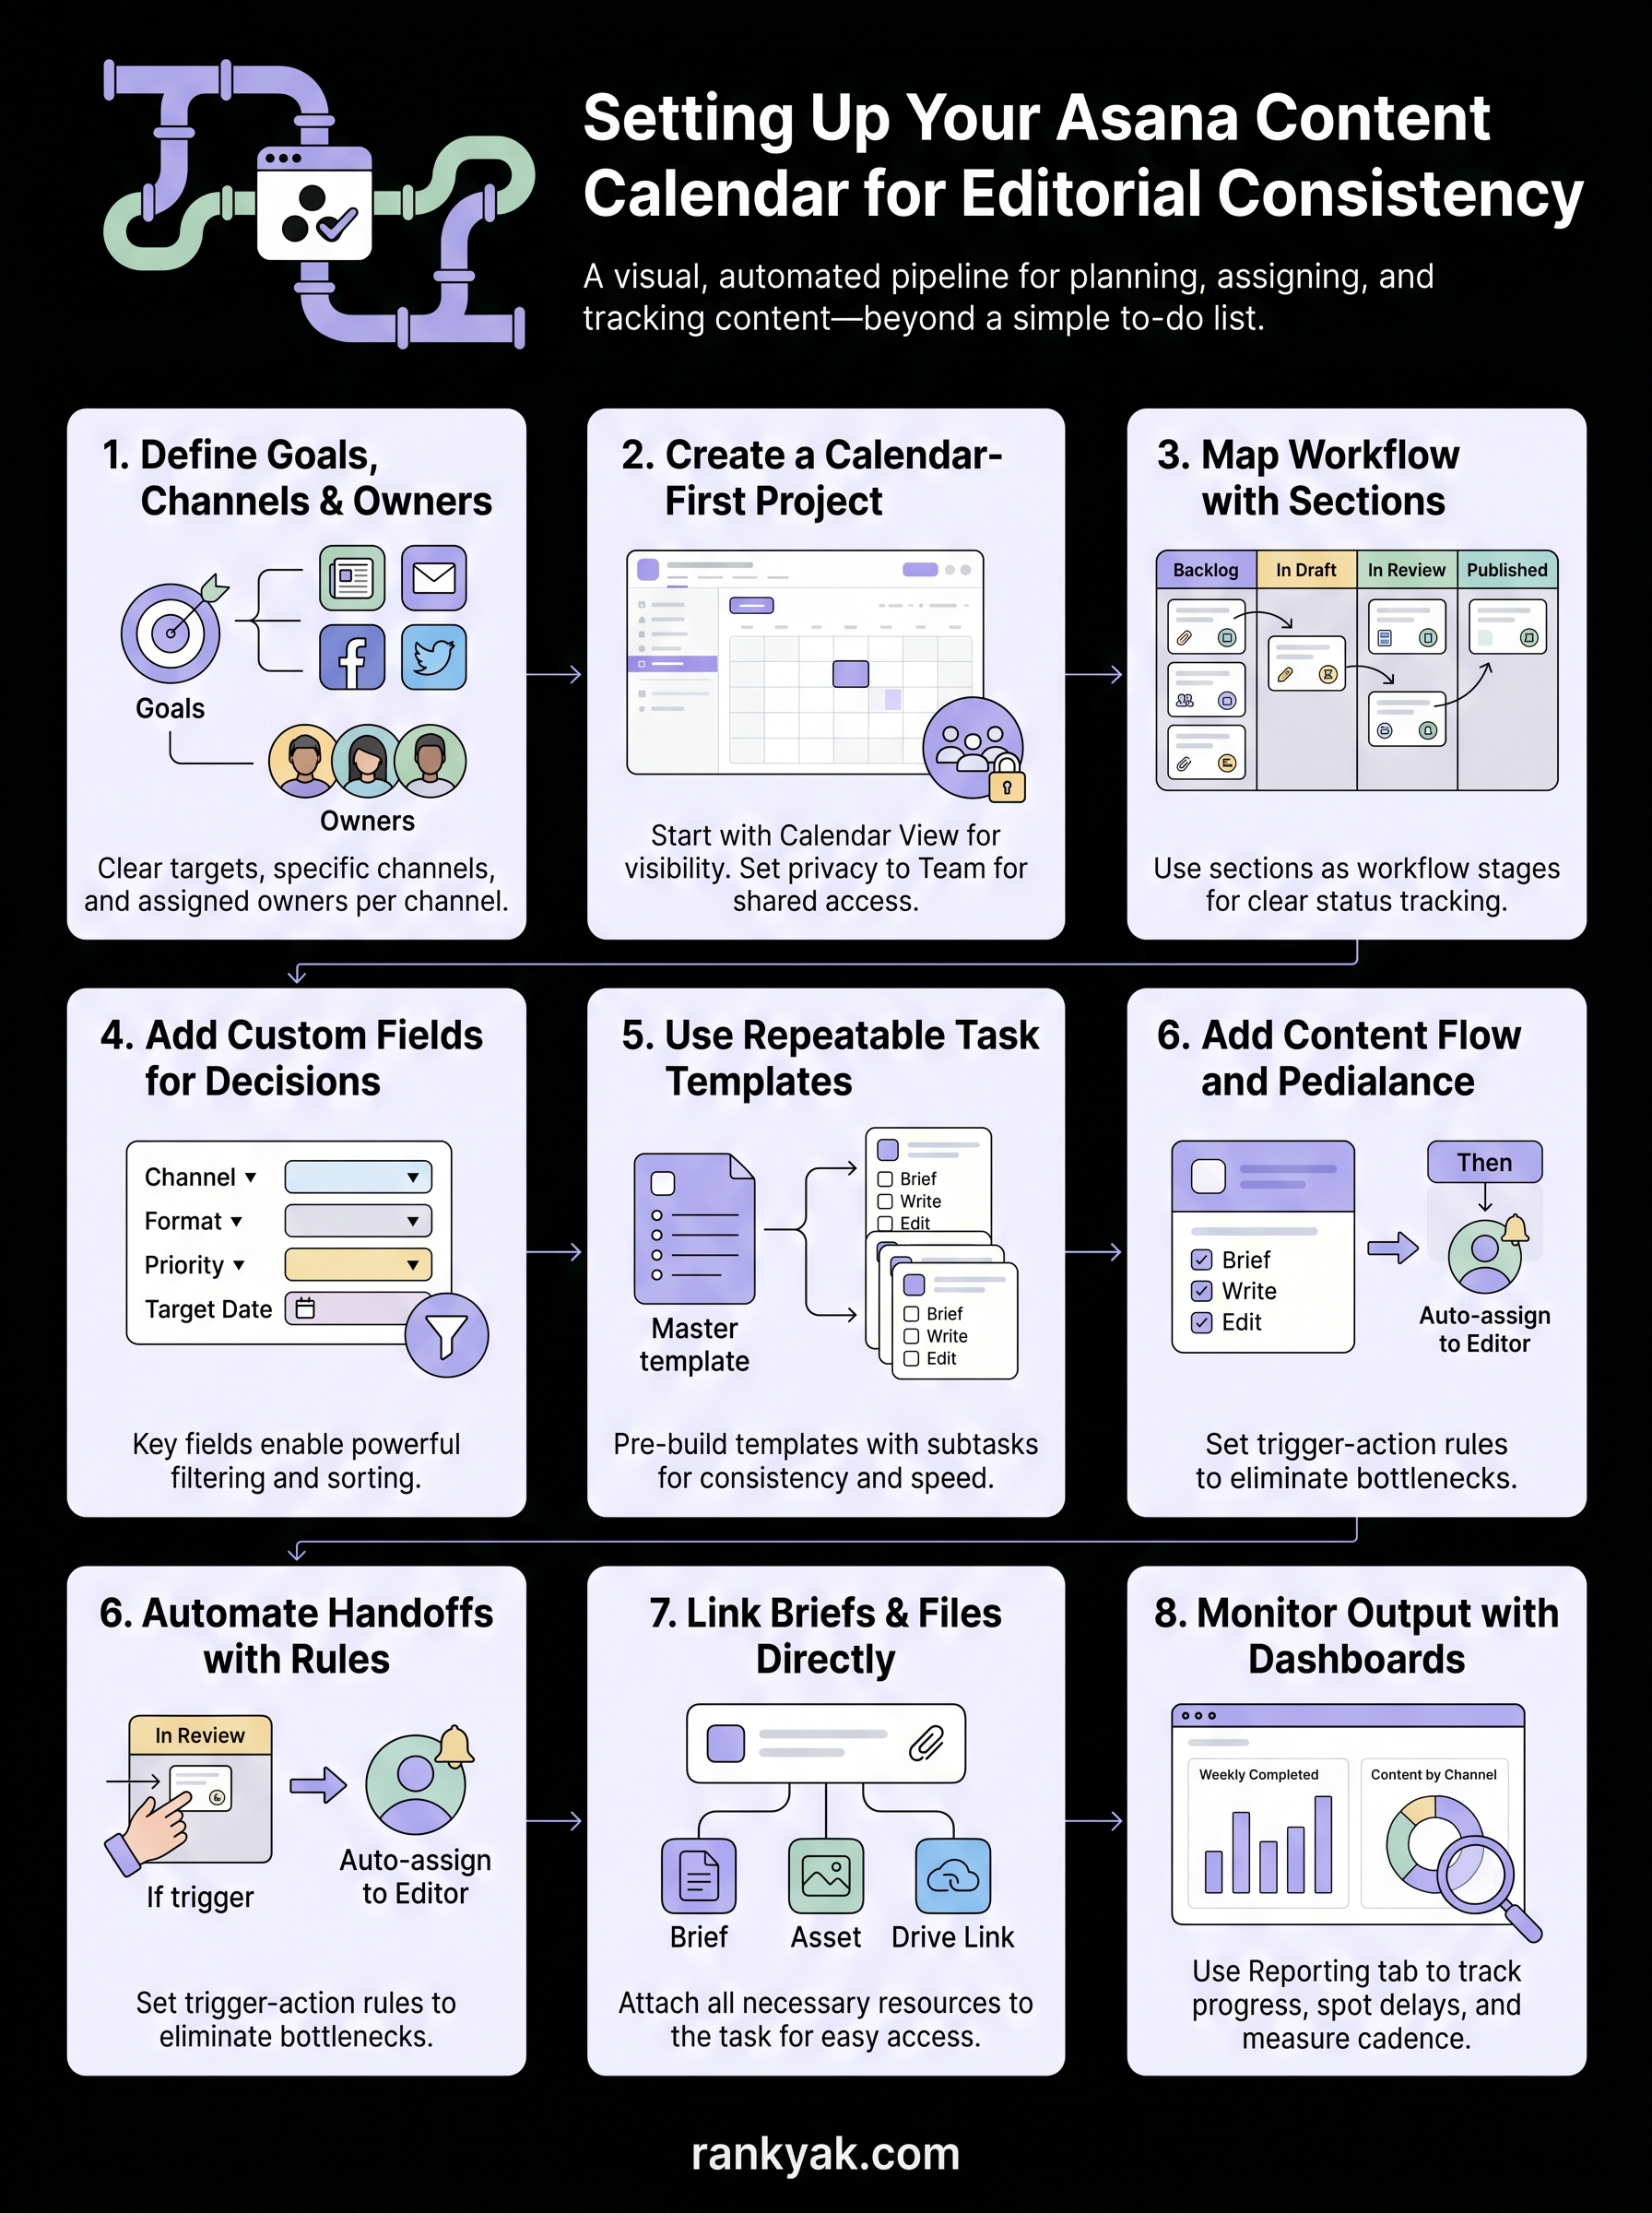
Step 1. Pick goals, channels, and owners
Before you build anything inside Asana, you need three things locked down: what you're trying to achieve, which channels you're publishing on, and who is responsible for each piece. Skipping this step leads to a calendar full of tasks with no clear purpose, where nobody knows who should be doing what or why any of it matters. Ten minutes of planning here saves hours of confusion later.
Define your content goals
Your content goals should tie directly to measurable business outcomes, not vague intentions like "publish more content." Pick one to three specific targets for the quarter. These goals will shape which content types you prioritize and how you sequence your calendar.
Common goal examples you can adapt:
- Organic traffic: Publish 12 SEO-targeted blog posts per month targeting keywords with under 2,000 monthly searches
- Lead generation: Produce two gated resources per quarter and write supporting blog posts that link to each one
- Brand authority: Publish one long-form case study every six weeks across the blog and LinkedIn
Writing your goals down before opening Asana keeps every task you create connected to a real reason.
Map your channels and formats
Once your goals are set, list every channel you publish to and the content formats each channel requires. This becomes the foundation for the custom fields you'll add in a later step, so being specific here matters.
| Channel | Format | Cadence |
|---|---|---|
| Blog | Long-form article | 3x per week |
| Email newsletter | Digest summary | 1x per week |
| Short post or carousel | 5x per week | |
| YouTube | Script + video | 2x per month |
Build this table for your own channels before setting up your Asana content calendar project, because your sections and task templates will reflect this list directly.
Assign clear ownership
Every content type needs one named person who is accountable for seeing it through from brief to published. That doesn't mean one person does all the work. It means one person owns the outcome. Map each channel to an owner like this:
- Blog: Content lead
- Email: Marketing manager
- Social: Social media coordinator
Defining ownership at the channel level prevents the common problem where a task sits in "In Review" for two weeks because everyone assumed someone else would move it forward.
Step 2. Create a calendar-first project
With your goals, channels, and owners defined, you're ready to build the actual project inside Asana. The way you name and configure this project from the start determines how easy it is for your team to use it week after week. Treat this setup as your foundation, because restructuring later costs time you don't have.
Name and configure the project
Open Asana and click "New Project" from your sidebar. Choose "Blank project" rather than a template, since you'll build this structure yourself to match your specific channels and workflow. Name the project something unambiguous, like "Content Calendar - 2026" or "Editorial Pipeline - Blog + Social." Keep the name short enough to scan but specific enough that new team members know exactly what it contains at a glance.
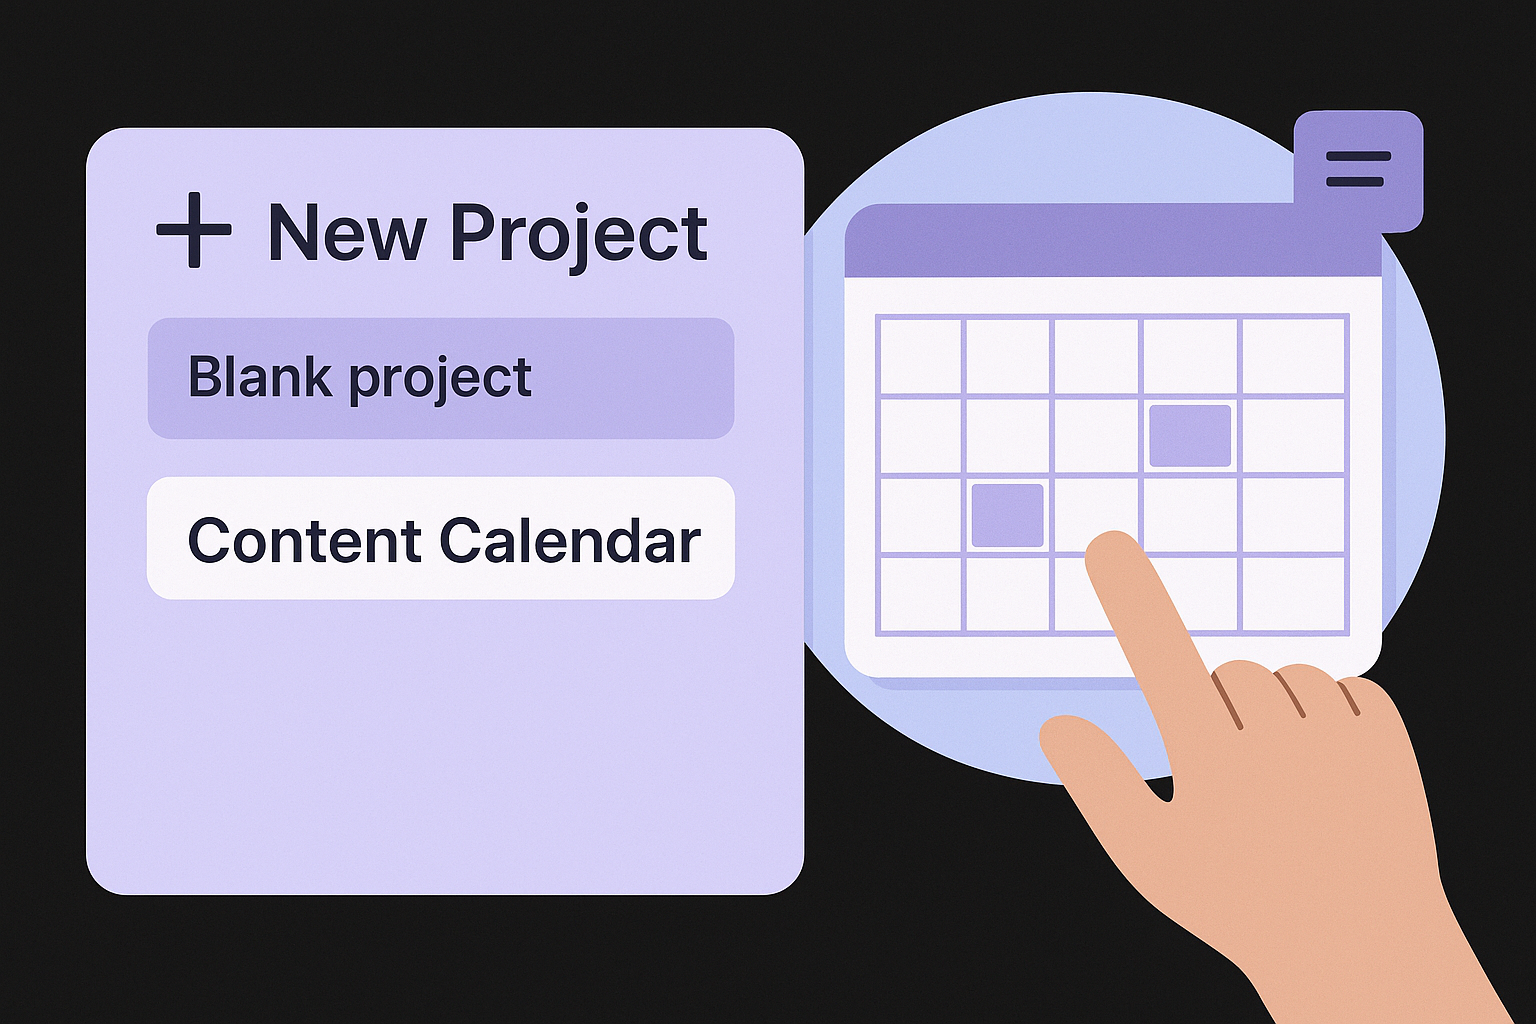
When Asana prompts you to choose a default view, select Calendar view before clicking create. This locks in the calendar-first experience your team will see every time they open the project. You can always switch to Board or Timeline, but starting in Calendar view reinforces the habit of thinking in publish dates rather than task counts.
Starting in Calendar view shifts your team's focus from activity to output, which is the mindset an editorial workflow actually needs.
Set privacy and sharing
After creating the project, set the privacy level to "Team" so every relevant contributor can see the calendar without needing a direct share link each time. Go to the project header, click the privacy icon, and choose your content or marketing team. This prevents the common problem where a writer can't see the full pipeline because someone forgot to add them manually.
Next, add all channel owners as project members using the "Share" option in the top right corner. Give writers and designers standard member access. Give your content lead or editorial manager admin access so they can adjust sections and fields without hitting permission walls mid-workflow. With your Asana content calendar shared and configured, your team has one central location to check what's planned, what's in progress, and what's waiting for a publish date, without asking anyone.
Step 3. Map your workflow with sections
Sections in Asana act as status columns for your content pipeline, and naming them well is one of the most practical things you can do when building your Asana content calendar. Each section represents a stage in your editorial workflow, so anyone opening the project knows exactly where every piece of content stands without reading through task descriptions or asking a teammate. Get your sections right and your calendar runs itself.
Build your section structure
Your sections should reflect the real steps a piece of content moves through, from initial concept to live URL. Keep them broad enough that every content type fits, but specific enough that the name alone tells a contributor what action is needed. Avoid generic labels like "In Progress" because they create ambiguity about whose court the task is actually in.
Here is a section structure that works across most editorial teams:
| Section name | What it means |
|---|---|
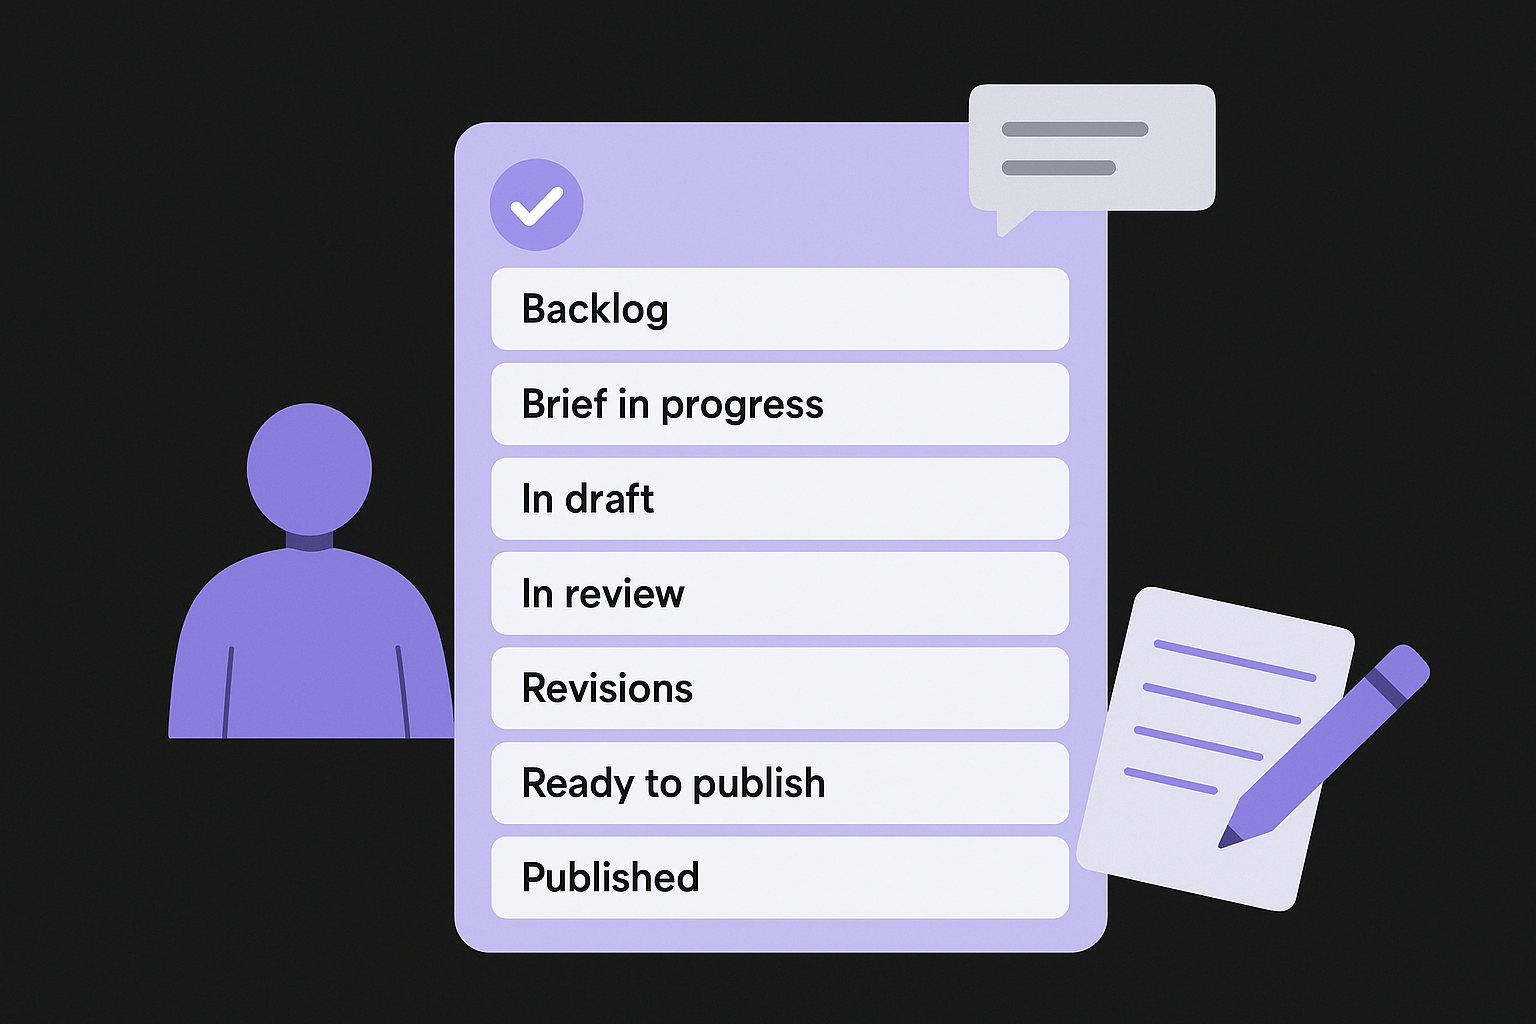
| Backlog | Ideas approved for future production, not yet scheduled |
| Brief in progress | Writer is building the brief or outline |
| In draft | Active writing is underway |
| In review | Draft is complete and waiting for editorial feedback |
| Revisions | Feedback given, writer is making changes |
| Ready to publish | Approved, formatted, and scheduled |
| Published | Live, with the URL logged in the task |
To create these sections in Asana, open your project in List or Board view, click "Add section" at the bottom of each column, and type the section name exactly as shown. Build all seven before adding any tasks, so your structure is complete from day one.
Treat sections as swim lanes, not archives
Each section is a live working space, not a historical record. Once content is published, move the task to the "Published" section and add the live URL in a task comment or custom field. This keeps your active workflow clean and gives you a running log of everything that shipped without cluttering the stages your team checks daily.
A section named "Published" is worth its weight in gold during quarterly reviews because you can see your full output in one filtered view.
Resist the urge to delete old tasks. Keeping published tasks in your project lets you spot patterns over time, like which content types consistently stall in review, so you can fix the bottleneck rather than repeat it.
Step 4. Add custom fields that drive decisions
Custom fields are where your Asana content calendar goes from a visual schedule to an actual decision-making tool. Without them, every task looks the same and you're forced to open each one individually to figure out what channel it belongs to, what format it is, or whether it's SEO-targeted. Adding the right fields upfront means you can sort, filter, and report on your content pipeline in seconds rather than scrolling through dozens of tasks to piece together the same information.
The fields worth adding
Every team has slightly different needs, but these six custom fields cover the decisions most editorial workflows require without cluttering your task view with fields nobody checks. Add them in order of how often your team will use them when filtering or sorting.
| Field name | Field type | Options to include |
|---|---|---|
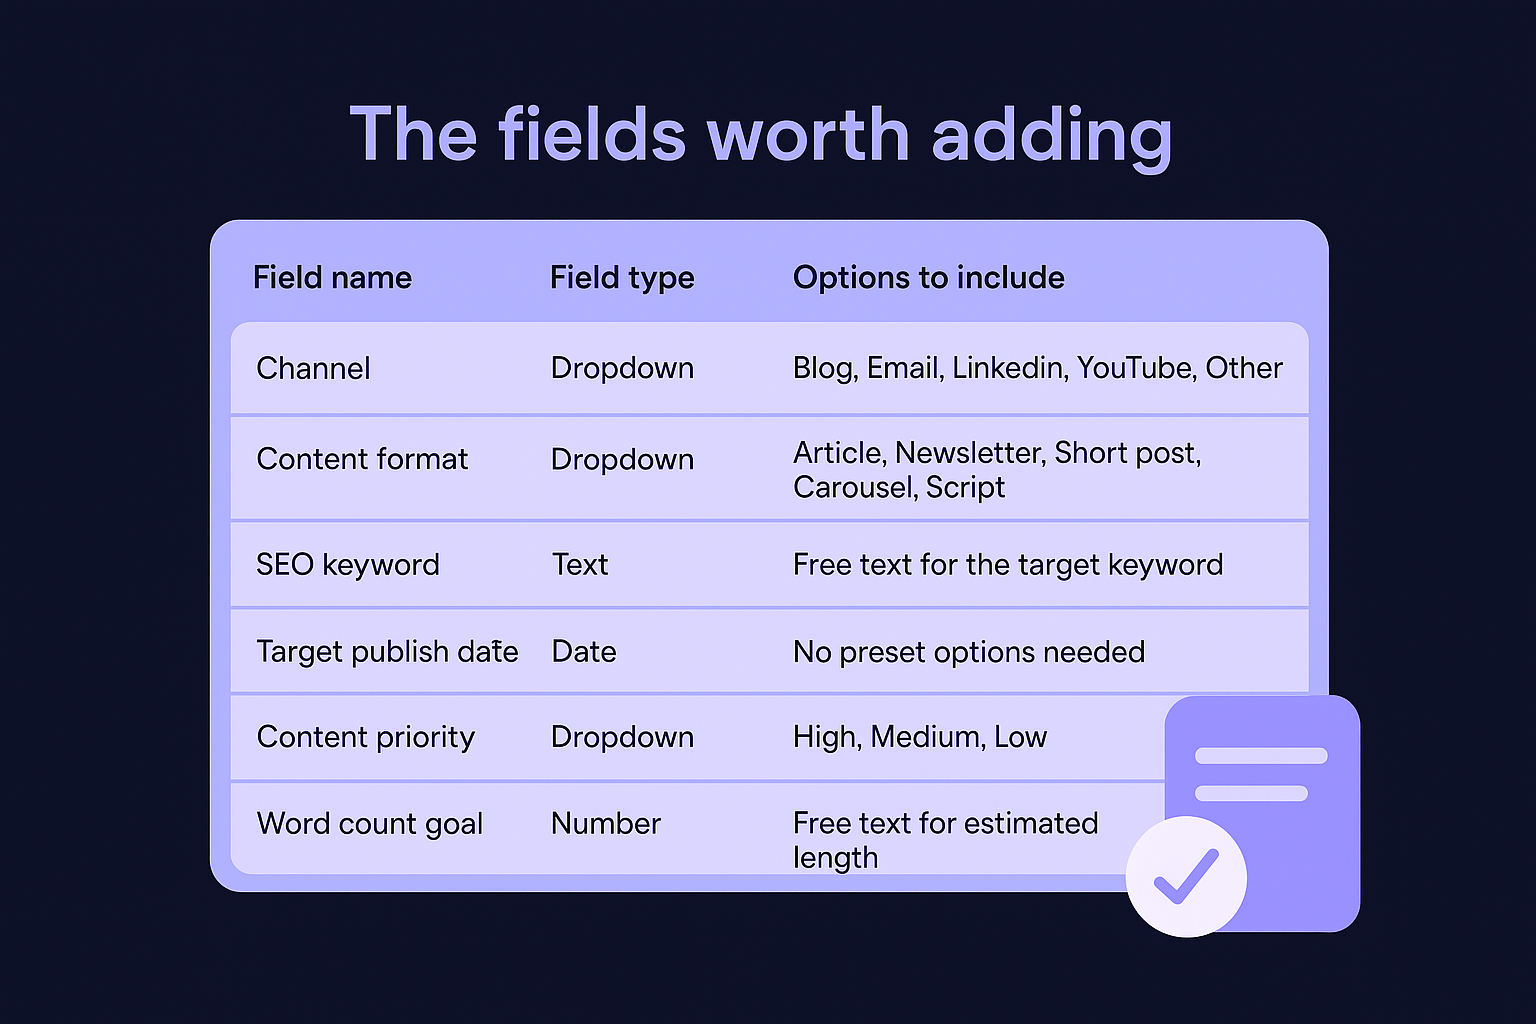
| Channel | Dropdown | Blog, Email, LinkedIn, YouTube, Other |
| Content format | Dropdown | Article, Newsletter, Short post, Carousel, Script |
| SEO keyword | Text | Free text for the target keyword |
| Target publish date | Date | No preset options needed |
| Content priority | Dropdown | High, Medium, Low |
| Word count goal | Number | Free text for estimated length |
To add these fields in Asana, open your project and click "Customize" in the top right corner. Select "Add custom field," then choose the field type from the dropdown. Name the field exactly as shown in the table, enter your options, and click "Create field." Repeat for each row above.
How to configure fields for filtering
Once your fields exist, pin the ones your team checks most often to the task row so they're visible without clicking into each task. In the project header, click "Customize" again and drag your priority and channel fields to the top of the list. Enable "Show in list" for each one.
Pinning two or three key fields to your list view eliminates the need to open individual tasks just to understand the status of your pipeline.
With your fields in place, you can filter the entire project by channel or priority using the filter bar at the top of any view, which makes sprint planning and capacity checks take minutes instead of a full team meeting.
Step 5. Turn each asset into a repeatable task
Every content type in your Asana content calendar follows a predictable set of steps: brief, draft, edit, format, publish. Instead of rebuilding that checklist from scratch every time you add a new task, create one task template per content type and reuse it for every piece you schedule. This removes the setup tax from your workflow and makes sure no step gets skipped because someone was in a hurry.
Build a task template for each content type
Open any existing task in your project and build out the subtasks, fields, and description that a new piece of that content type always requires. For a blog article, your template might look like this:
- Subtask 1: Confirm target keyword and search intent
- Subtask 2: Complete content brief (audience, angle, structure)
- Subtask 3: Write first draft
- Subtask 4: Editorial review and feedback
- Subtask 5: Apply revisions
- Subtask 6: Format in CMS and add internal links
- Subtask 7: Add meta title, meta description, and featured image
- Subtask 8: Final approval and schedule publish date
- Subtask 9: Confirm live URL and log in task comments
Fill in the custom fields on the template task too, such as channel, format, and priority level, so every duplicated task inherits those values and your filters stay accurate from the start.
Saving your field selections inside the template means new tasks arrive pre-configured rather than blank, which cuts setup time to under a minute.
Save and reuse your templates
Once your template task is complete, click the three-dot menu on the task and select "Save as template." Asana stores it in your project's template library. Any team member can then click "Use template" when adding a new piece of content, and the entire subtask list populates instantly with all fields and assignments intact.
Build separate templates for each format in your channel list, such as newsletter, LinkedIn carousel, and YouTube script. Keeping them distinct prevents your editorial team from hunting through irrelevant subtasks and lets each contributor focus only on the steps that apply to the content they're producing.
Step 6. Automate handoffs with rules
Rules in Asana are trigger-and-action automations that move tasks, reassign owners, and update fields without anyone lifting a finger. In an Asana content calendar, every handoff between stages, from writer to editor, from editor to publisher, is a point where work stalls if someone forgets to follow up. Rules eliminate that lag by making the handoff automatic the moment a status changes, so your team focuses on producing content rather than managing the pipeline.
Set up your first rule
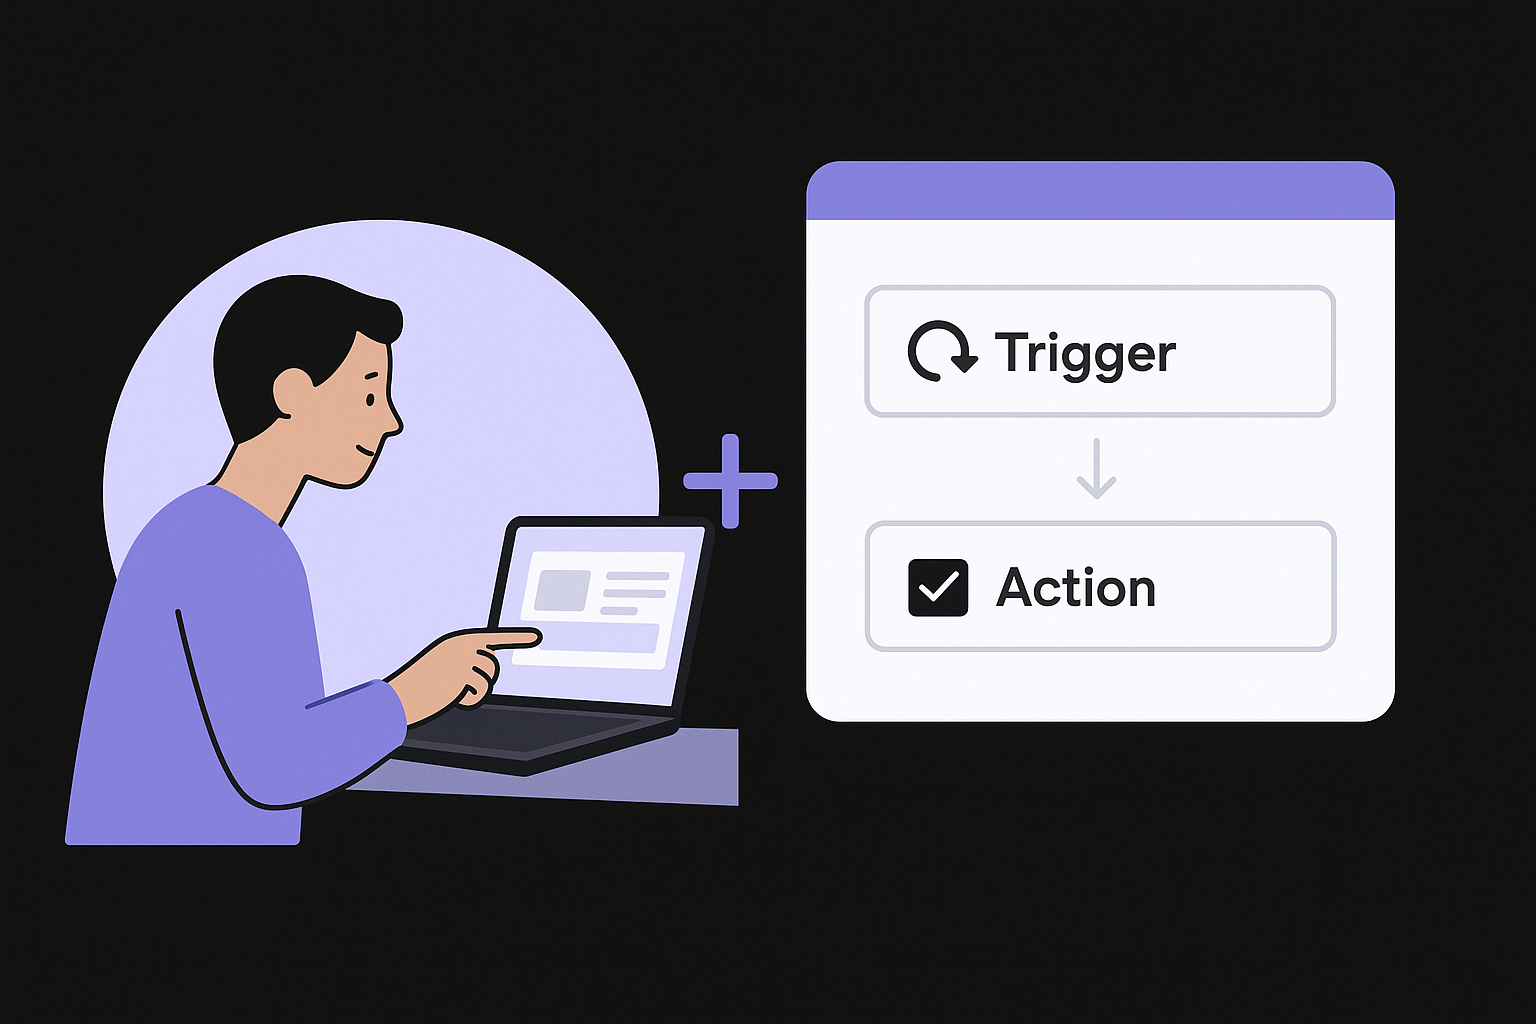
To create a rule, open your project and click "Customize" in the top right corner, then select "Rules" from the sidebar. Click "Add rule" and choose "Create custom rule." Asana presents you with a simple trigger-and-action builder where you define what event fires the rule and what happens next.
Here is a practical first rule to build for any editorial workflow:
- Trigger: Task is moved to the "In review" section
- Action: Assign the task to your editor AND add a comment that says "Draft complete. Please review and leave feedback within 48 hours."
Save the rule, and from that point forward, every writer who moves their task to review automatically hands it off to the correct person with a reminder, no Slack messages or manual reassignments needed.
Once a rule handles a handoff, your team stops relying on memory and starts relying on the system, which means fewer missed deadlines.
Build a rule set for each stage transition
After your first rule works, add one rule per major stage transition in your workflow. Cover the full path from brief to publish so no handoff depends on a human remembering to take action.
| Trigger | Action |
|---|---|
| Task moved to "In draft" | Assign to writer, set due date 5 days from today |
| Task moved to "In review" | Reassign to editor, post review reminder comment |
| Task moved to "Revisions" | Reassign to writer, add "Revision requested" tag |
| Task moved to "Ready to publish" | Reassign to publisher, set publish date field |
| Task completed | Move to "Published" section automatically |
Building this full rule set takes roughly 20 minutes and removes the single biggest source of pipeline delays: the assumption that someone else already handled the handoff.
Step 7. Link files, briefs, and related projects
Your Asana content calendar loses much of its value if the files, briefs, and background materials your team needs live somewhere else entirely. When a writer has to dig through Google Drive folders or ask a manager to send the correct brief, production time drops and errors creep in. Linking every resource directly to the task that needs it keeps your team self-sufficient and your workflow moving without unnecessary back-and-forth.
Attach files and briefs directly to tasks
Every task in your calendar should carry all the materials a contributor needs to complete their stage without asking anyone for anything. Asana lets you attach files from your computer, Google Drive, Dropbox, or OneDrive directly inside any task by clicking the paperclip icon in the task detail panel. Use this for content briefs, brand guidelines, keyword research exports, and any design assets tied to that piece of content.
Follow this attachment structure for each task type:
| Content type | Files to attach |
|---|---|
| Blog article | Brief doc, target keyword list, competitor reference URLs |
| Email newsletter | Copy template, brand voice guide, previous send metrics |
| LinkedIn post | Caption draft, approved image or carousel file |
| YouTube video | Script doc, talking points outline, thumbnail brief |
Pasting a direct Google Drive link in the task description works just as well as a file upload for documents your team edits collaboratively, since clicking the link opens the live file rather than a static copy. This approach also means any updates your editor makes to the brief appear automatically without anyone needing to re-upload a revised version.
Centralizing all files inside the task removes the single most common reason contributors say they were waiting on something.
Connect related Asana projects
Some content assets depend on work happening in a separate Asana project, such as a product launch tracked in your campaign project or a landing page managed by your development team. In the task detail panel, click "Add dependencies" and search for the related task in the other project. Asana will flag your content task as blocked if the dependency is not yet complete, giving your team an automatic signal to check back rather than publishing content before the linked work is ready.
Step 8. Monitor output with dashboards
Publishing content consistently means nothing if you can't tell whether your Asana content calendar is actually performing as planned. Asana's built-in dashboard and reporting tools let you track output, spot bottlenecks, and measure whether your team is hitting the cadence you set in Step 1, without pulling data from a separate spreadsheet or scheduling a weekly status meeting to figure out where everything stands.
Build a reporting dashboard in Asana
Asana's Reporting tab, found in your left sidebar, lets you create a custom dashboard that surfaces the metrics your editorial team checks most often. Click "Reporting" and then "New dashboard," name it something like "Content Output Report," and start adding charts. Each chart pulls live data from your project, so the numbers update automatically every time a task moves, gets completed, or changes fields.
A live dashboard replaces the weekly "can everyone send me an update" email that eats 20 minutes out of every Monday.
Build your dashboard with these four chart types to cover the full picture of your pipeline health:
| Chart type | What to track | Field to use |
|---|---|---|
| Bar chart | Tasks completed per week | Completion date |
| Donut chart | Content by channel | Channel custom field |
| Milestone chart | Upcoming publish dates | Target publish date field |
| Burnup chart | Total output vs. planned cadence | Task count over time |
Track the metrics that matter
Once your dashboard is live, check it once a week rather than daily. Daily checks create noise; weekly checks give you enough data to see whether a pattern is forming, like drafts stacking up in review because your editor is overloaded, or content skewing heavily toward one channel while others go quiet.
The two numbers to watch most closely are tasks completed against your planned cadence and average time tasks spend in each section. If a task sits in "In review" for more than five business days on average, your rule set from Step 6 may need a tighter follow-up action, such as a due date trigger that sends the editor a reminder after 48 hours with no movement. These small adjustments to your rules based on real dashboard data keep your workflow accurate instead of aspirational.
Keep it running each month
Your Asana content calendar only stays useful if you maintain it consistently. Set aside 30 minutes at the start of each month to do three things: archive completed tasks from the previous period, add new content tasks for the upcoming four weeks, and review your dashboard to check which stages caused the most delays. This monthly reset keeps your pipeline clean and your team focused on what's actually next rather than scrolling past outdated tasks.
Review your rules and templates every quarter. Workflows that worked in January may not fit your team's size or cadence by April, so adjust section names, field options, or automation triggers as your needs shift. Small, regular maintenance prevents the slow decay that turns a well-built system into a neglected one.
If filling your calendar feels like the harder problem, RankYak handles keyword research, article creation, and daily publishing automatically, so your pipeline stays full without the manual effort. Start your free trial and put content production on autopilot.

Get Google and ChatGPT traffic on autopilot.
Start today and generate your first article within 15 minutes.

SEO revenue calculator
How much revenue is your website leaving on the table?
Take a quick quiz and see exactly how much organic revenue you're missing out on, along with personalized tips to fix it.
-
4 questions, under 1 minute
-
See traffic and revenue potential
-
No email required
Free · takes 1 minute · no signup needed
Question 1 of 4
Question 2 of 4
Question 3 of 4
Question 4 of 4
Your SEO growth potential
Extra visitors / month
after 6-12 months of consistent publishing
Revenue potential / year
at your niche's avg. conversion rate
Articles needed (12 mo)
to reach this traffic level
ROI with RankYak
at $99/mo ($1,188/year)
To hit that number, you'd need to:
- Build a topical authority strategy for your niche
- Research keywords & map out a full topical cluster
- Write, edit & publish an article every single day
- Build backlinks to the articles you publish
RankYak handles all of this automatically, every day.
* Estimates based on industry averages. Results vary by niche, competition, and domain authority. Most SEO results become visible after 3-6 months of consistent publishing.